Shortcode Creator allows you to create custom shortcodes using HTML or PHP code. This guide contains complete information on how to install the plugin, activate your license, and start creating custom shortcodes.
On this page
- Installing the plugin
- Activating the license
- Updating the plugin
- Demo shortcodes
- Creating a shortcode
- Creating a content placeholder
- Shortcode Editor
- Attribute field types
- Exporting custom shortcodes
- Importing custom shortcodes
Installing the plugin
Premium add-ons are distributed as separate plugins in the zip format. To install the add-on, you should download it first. Use the download link from the email you’ve received after purchase to download zip-archive with the add-on. Then follow the simple steps below.
Installation from within the Dashboard
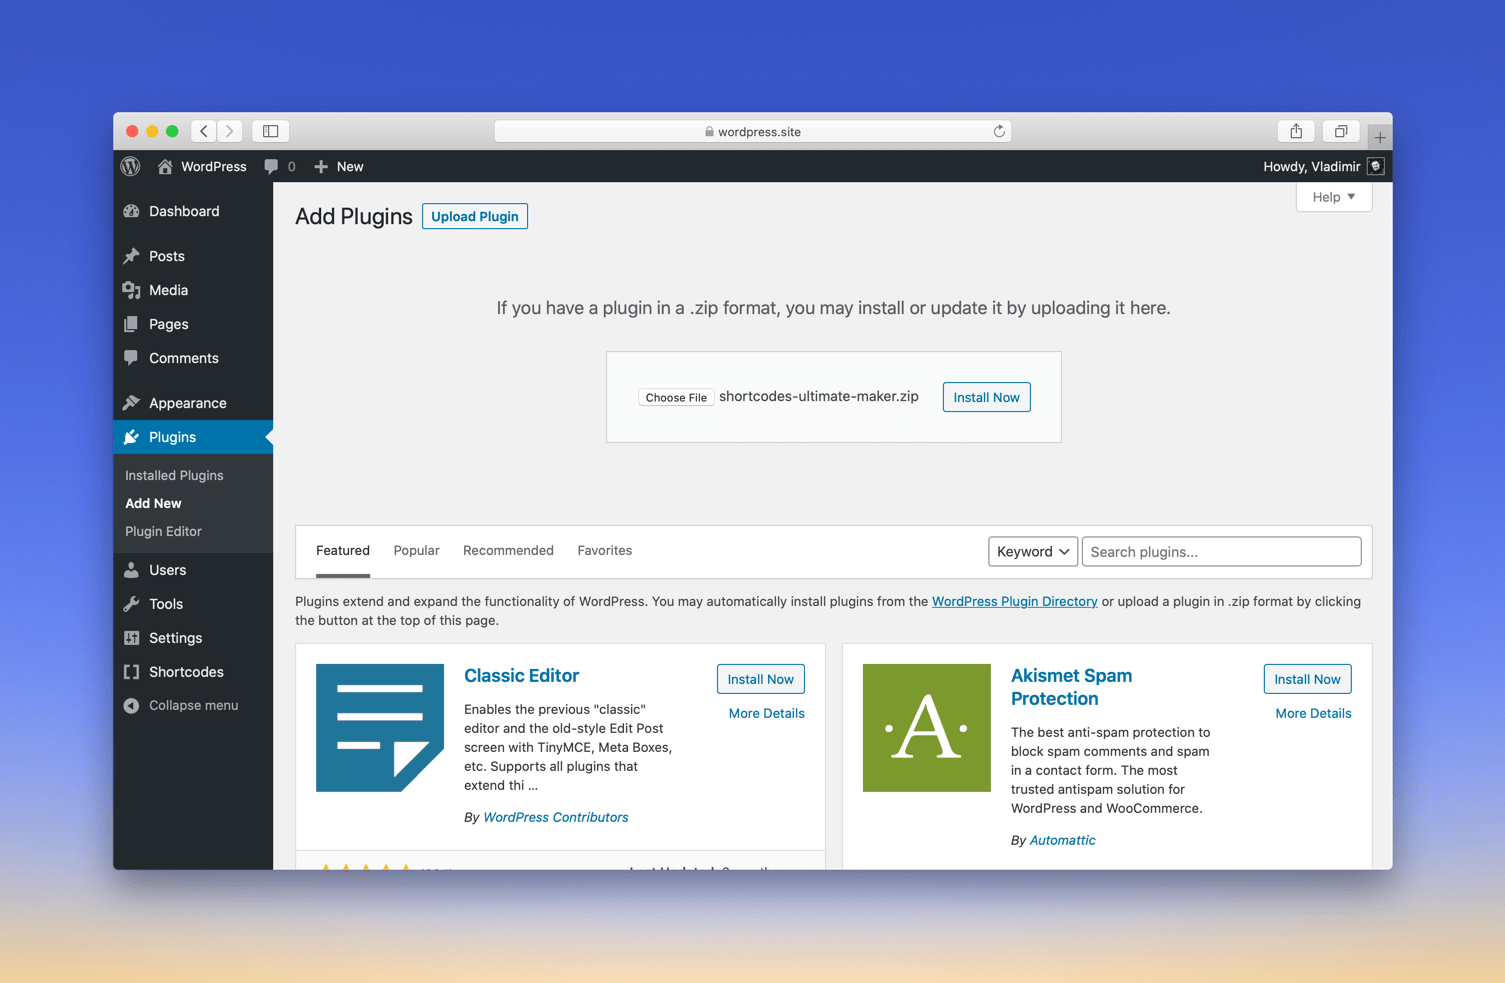
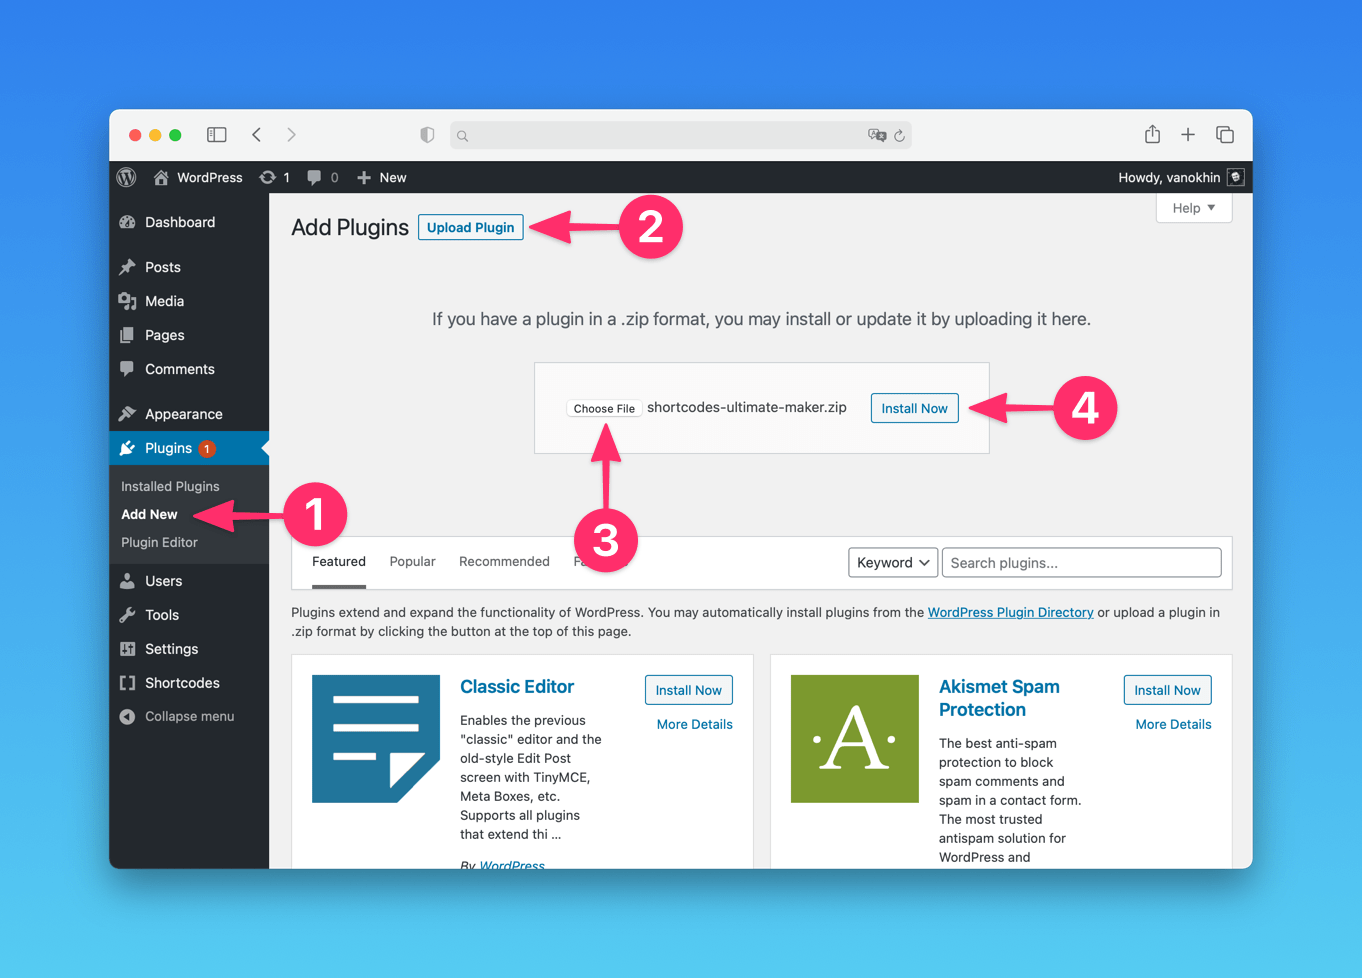
- Navigate to Dashboard → Plugins → Add new;
- Press the Upload Plugin link at the top of the screen;
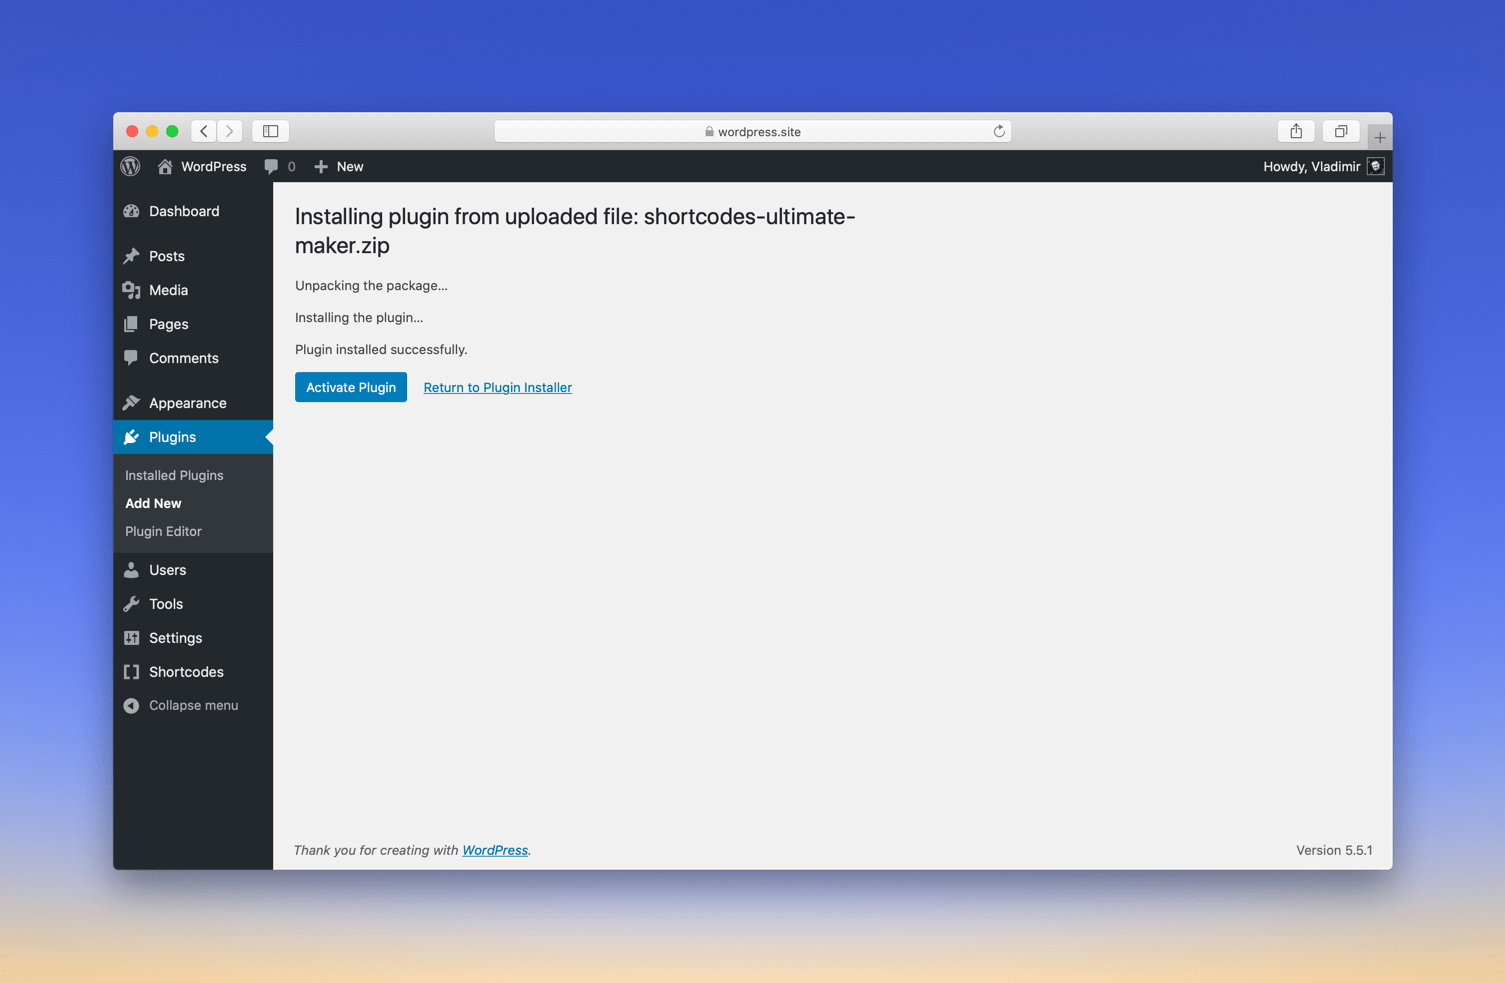
- In the opened dialog choose the downloaded zip-archive and press the Install Now button;
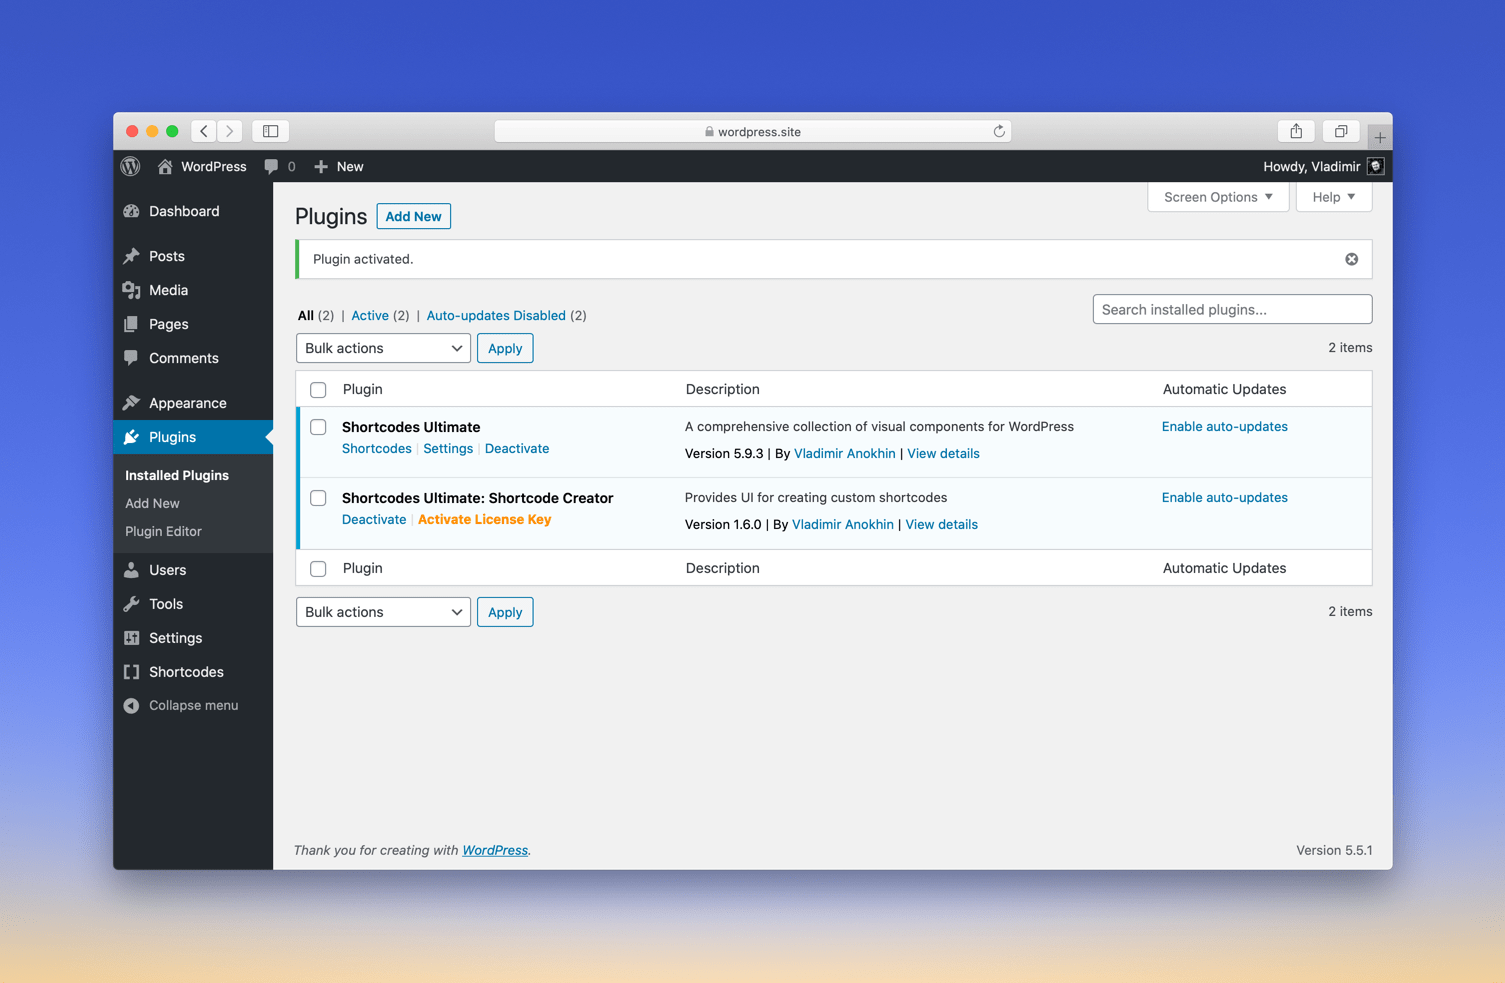
- Wait until the installation is completed and press the Activate Plugin link.

Installation through FTP
- Unzip the downloaded archive using an archiver app;
- Copy unpacked folder with add-on to FTP server, to /wp-content/plugins/ folder; As a result, the path to add-on folder should look like: /wp-content/plugins/shortcodes-ultimate-maker/;
- Go to Dashboard → Plugins page;
- If you made everything correctly in step 2, a new plugin will appear in the plugin list;
- Press the Activate link near the add-on to activate it.

Activating the license
Your license key must be activated in order to enable automatic updates for the add-on.
Activation process
An email with a license key will be sent to you right after the purchase of a premium add-on. If you’ve lost the email, please visit the Restore Purchase page to recover that information.
Follow the steps below to activate your license key.
- Log in to the dashboard of your site (wp-admin);
- Navigate to Dashboard → Shortcodes → Settings and scroll page down;
- Paste the received license key into the License Key field;
- Press the Save Changes button to activate the license key.
You can clear the License key field and click Save Changes to deactivate license key later.
License activation errors
The following errors may occur upon activation of a license key.
Invalid license key
This error may occur if you’re trying to activate XXXX-XXXX-XXXX-XXXX (four groups of four digits/letters, separated by hyphens).
This error may also occur in local development environments. If you’re trying to activate a license key on local site, for example, WordPress.wp or mywp.develop, you’ll get this error.
However, you can activate license key on the following local domains: *.dev, *.local, localhost. If you’re using other domain name for local site, you can still activate license key manually. Follow this guide to do that.
License key reached its activation limit. Deactivate this license key on other sites
If you’ve purchased a license key with a limit on the number of websites (Single Site or 2-5 Sites options), you could only activate it on the specified number of websites. This error indicates that your license key has reached its activation limit. You should deactivate this license key on other websites to be able to use it again. Just clear License key field on any previous site to deactivate license key on that site. If you do not remember at which site(s) you have activated license key, please contact support.
This license key is intended to use with another add-on
Each license key is intended for use with a specific add-on. It means you can not activate Extra Shortcodes add-on (example) using license key of Shortcode Creator add-on (example). If you are feeling confused about purchased license keys, please contact support.
Unable to connect to the activation server
If you’ve faced this error, it’s most probably that your site unable to connect to the activation server. In this case, you’ll need to activate your license key manually. This article will guide you through manual license key activation.
Unknown error
This error should never happen. If you’ve faced it, please contact support immediately.
Multisite installations
On multisite installations, license key must be activated only on the main site. The plugin should be updated only on the main site too.
The main site is the site in your network that lives on the same domain as your network admin. For example, if your network admin is accessible with the following URL example.com/wp-admin/network/, you can access the dashboard of your main site by going to example.com/wp-admin/.
Localhost / Staging
You can activate a license key on the following local domains:
- localhost
- *.local
- *.dev.cc
Activations made on a local domain won’t be counted. If you’re using another domain name for a local site or for a staging site, you can still activate the license key manually. Follow this guide to do that.
Manual activation
Step 1
Open up functions.php file of your active theme and paste the following code:
// Use this code to activate Extra Shortcodes add-on
update_option( 'su_option_extra-shortcodes_license', 'ENTER-YOUR-LICENSE-KEY-HERE' );

// Use this code to activate Additional Skins add-on
update_option( 'su_option_additional-skins_license', 'ENTER-YOUR-LICENSE-KEY-HERE' );

// Use this code to activate Shortcode Creator (Maker) add-on
update_option( 'su_option_shortcode-creator_license', 'ENTER-YOUR-LICENSE-KEY-HERE' );
Step 2
Replace ENTER-YOUR-LICENSE-KEY-HERE with your license key.
Step 3
Open any page of your site (no matter front page or any admin page). This will run the code in functions.php file.
Step 4
Now your license key successfully added to the database and you can remove the code from the functions.php file.
Step 5
Check your license key status by navigating to Dashboard → Shortcodes → Settings page.
Updating the plugin
Automatic updates
You need to activate your license key to enable automatic updates. See the Activating the license section to learn how to do that.
This add-on can be updated as a regular plugin from within the Dashboard of your site. To install an updated version, follow the instructions below.
- Navigate to Dashboard → Updates;
- Under the Plugins section select the plugin by ticking the checkbox;
- Click the Update Plugins button.
If you see the “Update package not available” error, read the Fixing “Update package not available” error article.

Updating the plugin manually through the Dashboard
If you’re unable to install an update automatically for some reason, you can always update the add-on manually. Follow the instructions below.
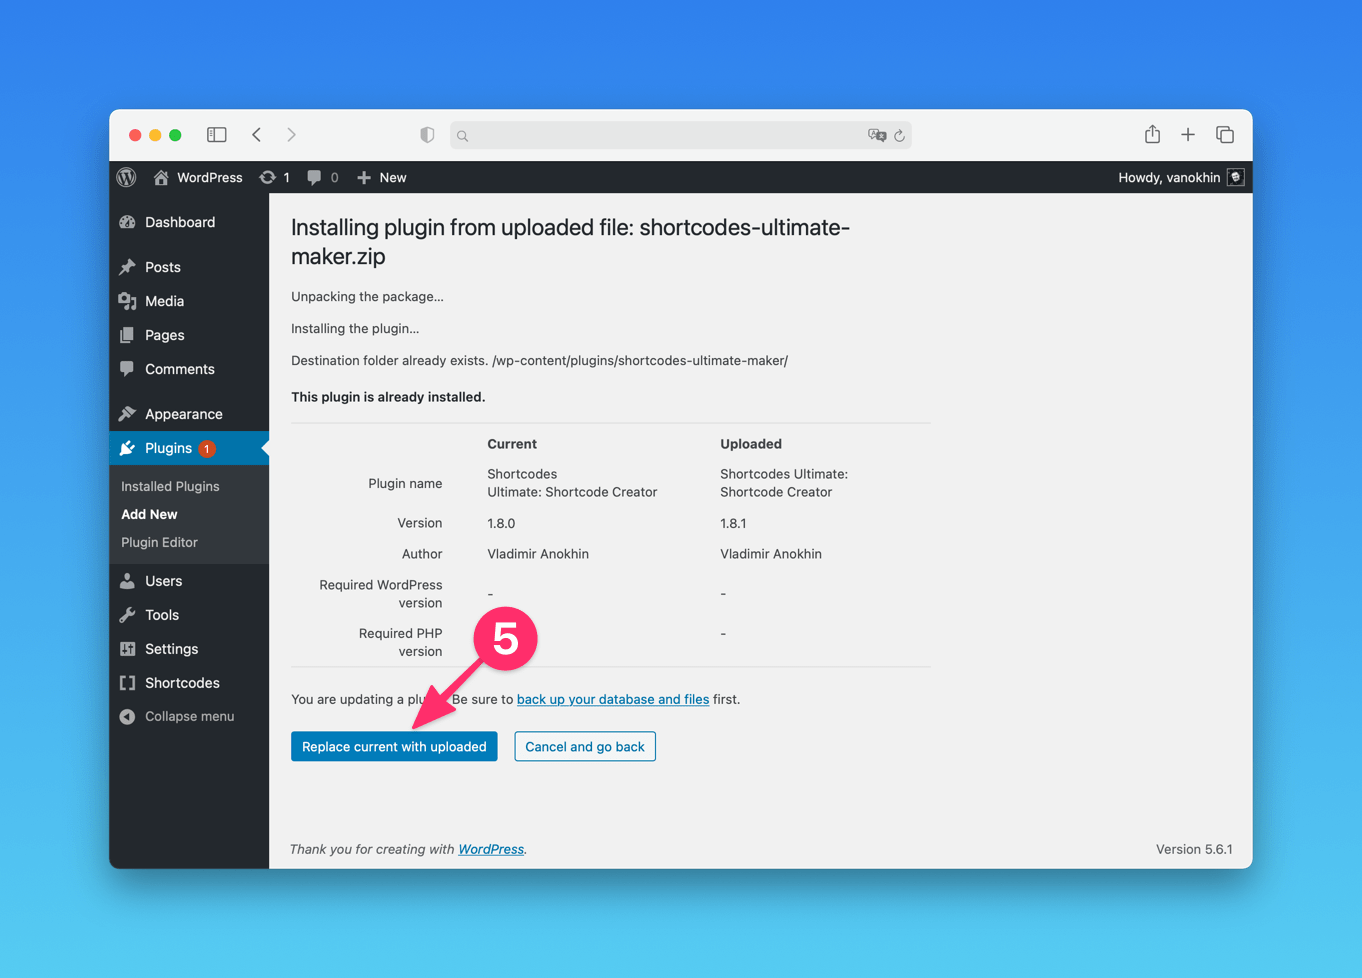
- Navigate to Dashboard → Plugins → Add New;
- Click the Upload Plugin button;
- Choose the downloaded zip-archive with the updated version;
- Click the Install Now button;
- WordPress will ask you to replace the existing version with the new one, click the Replace current with uploaded button to confirm.
Updating the plugin manually over FTP
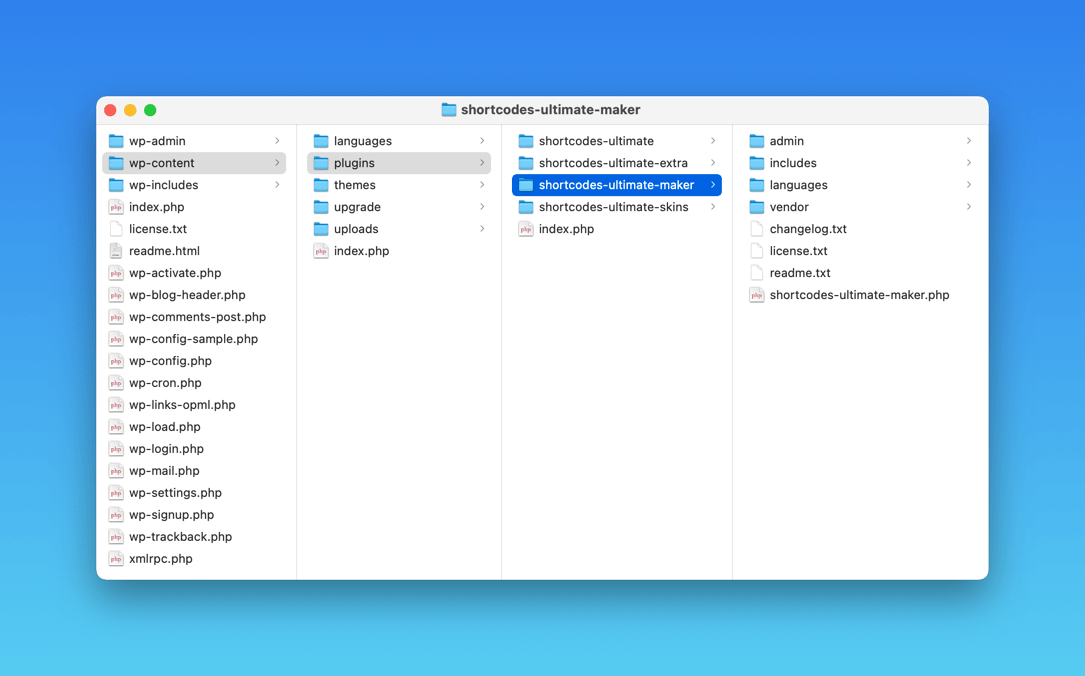
If you need to update the plugin over FTP, it’s as simple as installing the plugin. Follow the steps below.
- Download the updated version in a zip format and unpack it;
- Upload the unpacked folder shortcodes-ultimate-maker to /wp-content/plugins/ directory on your server, so the resulting path would be /wp-content/plugins/shortcodes-ultimate-maker/.
Please note, since you’re updating the existing plugin on your server, the shortcodes-ultimate-maker directory already exists. So, just replace it with the new one.
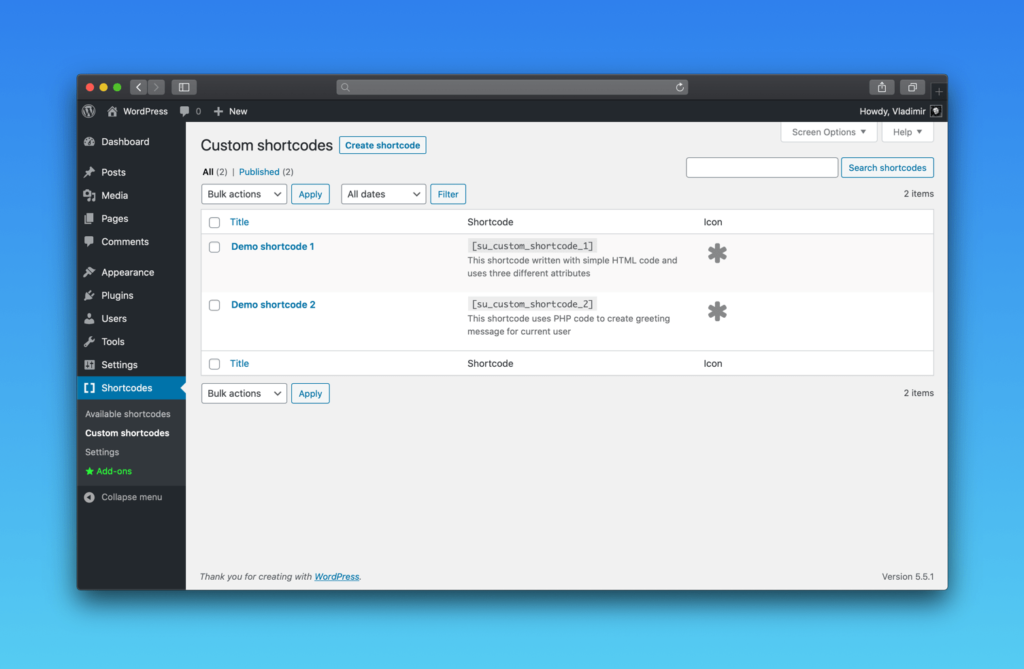
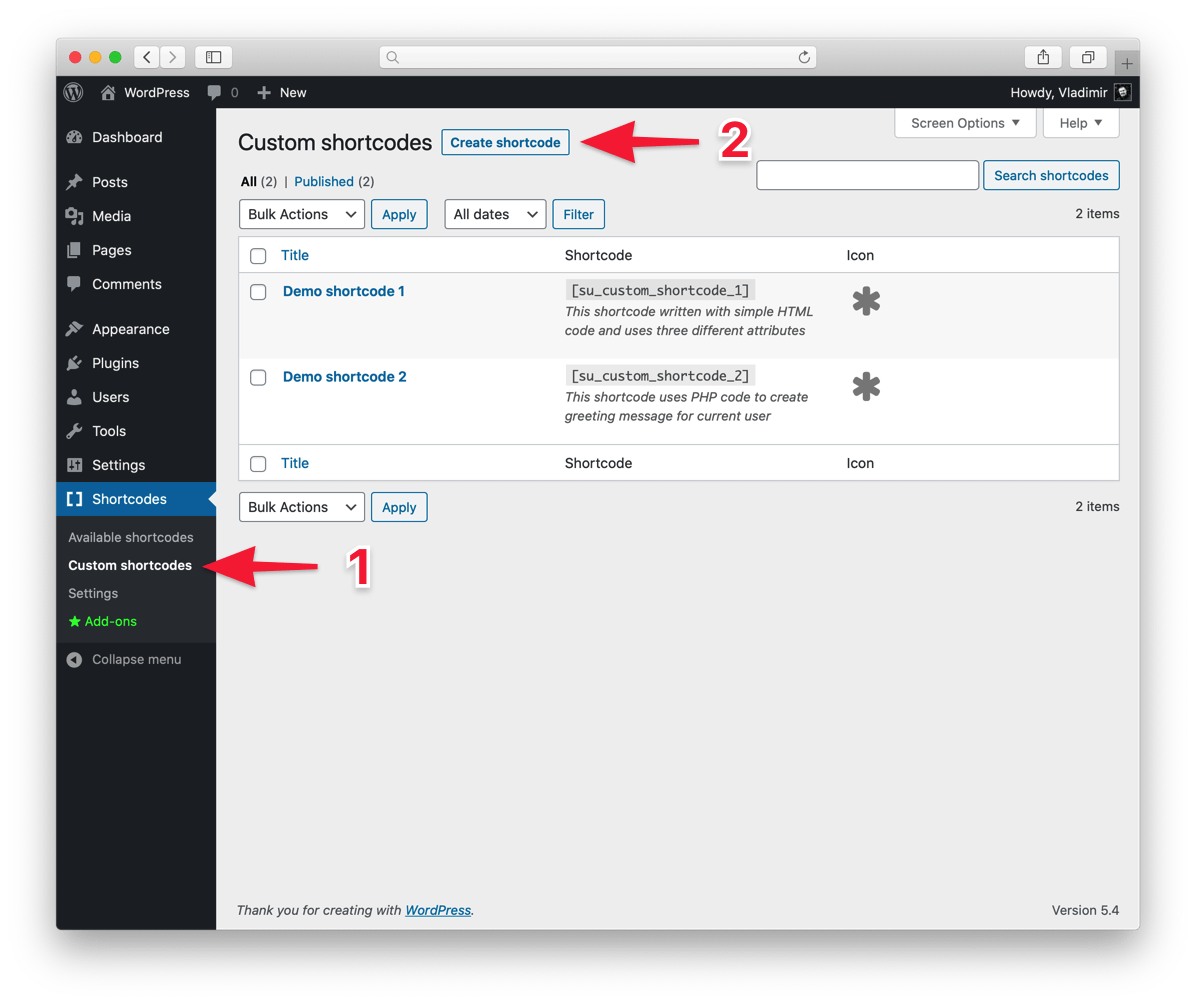
Demo shortcodes
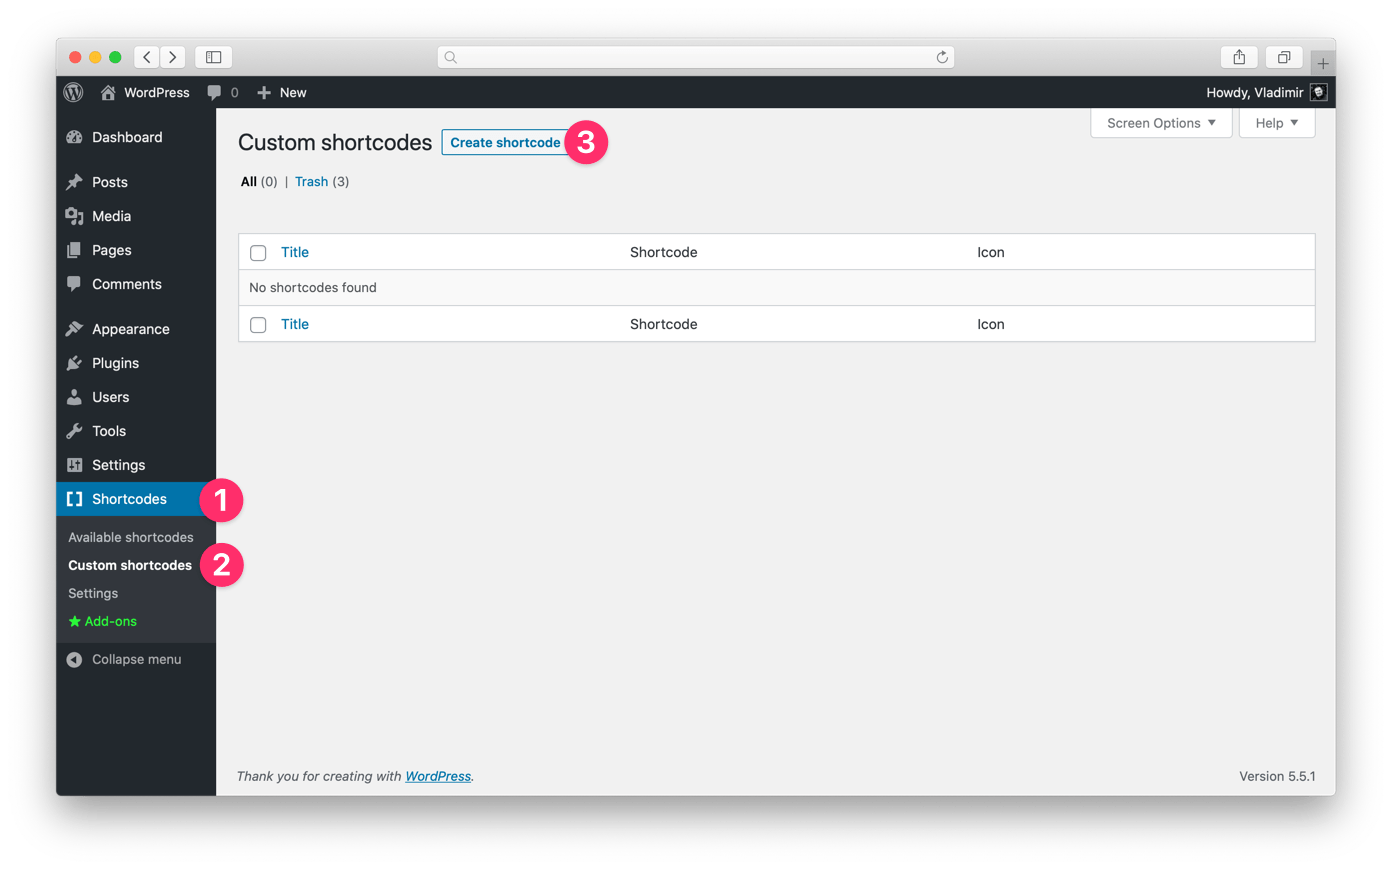
Before reading, navigate to Dashboard → Shortcodes → Custom shortcodes. There you’ll find 2 demo shortcodes that are created at the first activation of the add-on. You can edit them to see how they work.
Creating a shortcode
To help you to understand how does this feature work, let’s create a simple shortcode with an attribute. Follow the steps below.
Step 1: Create a new shortcode and give it a name
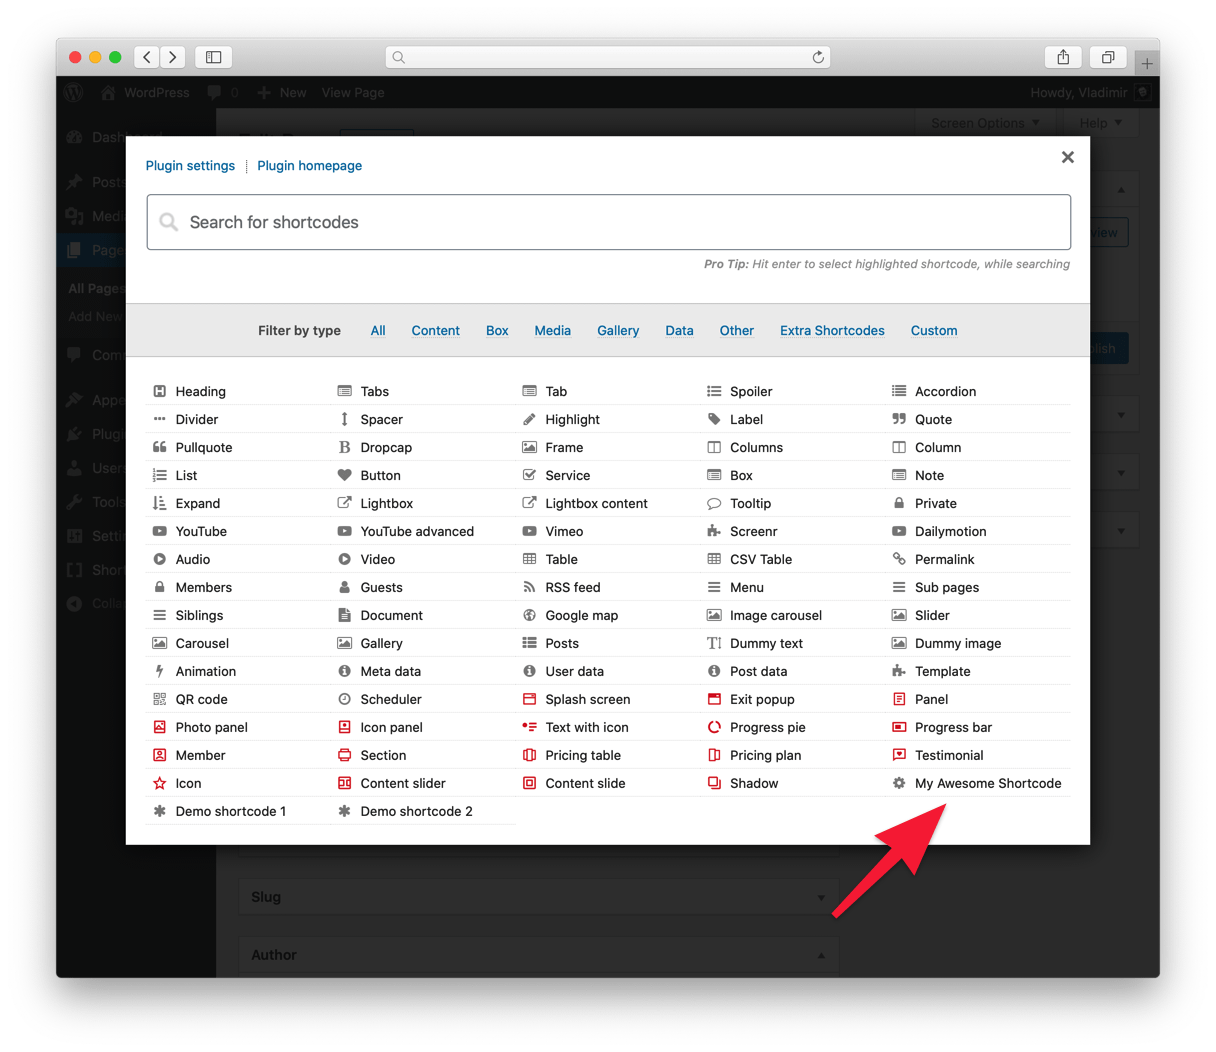
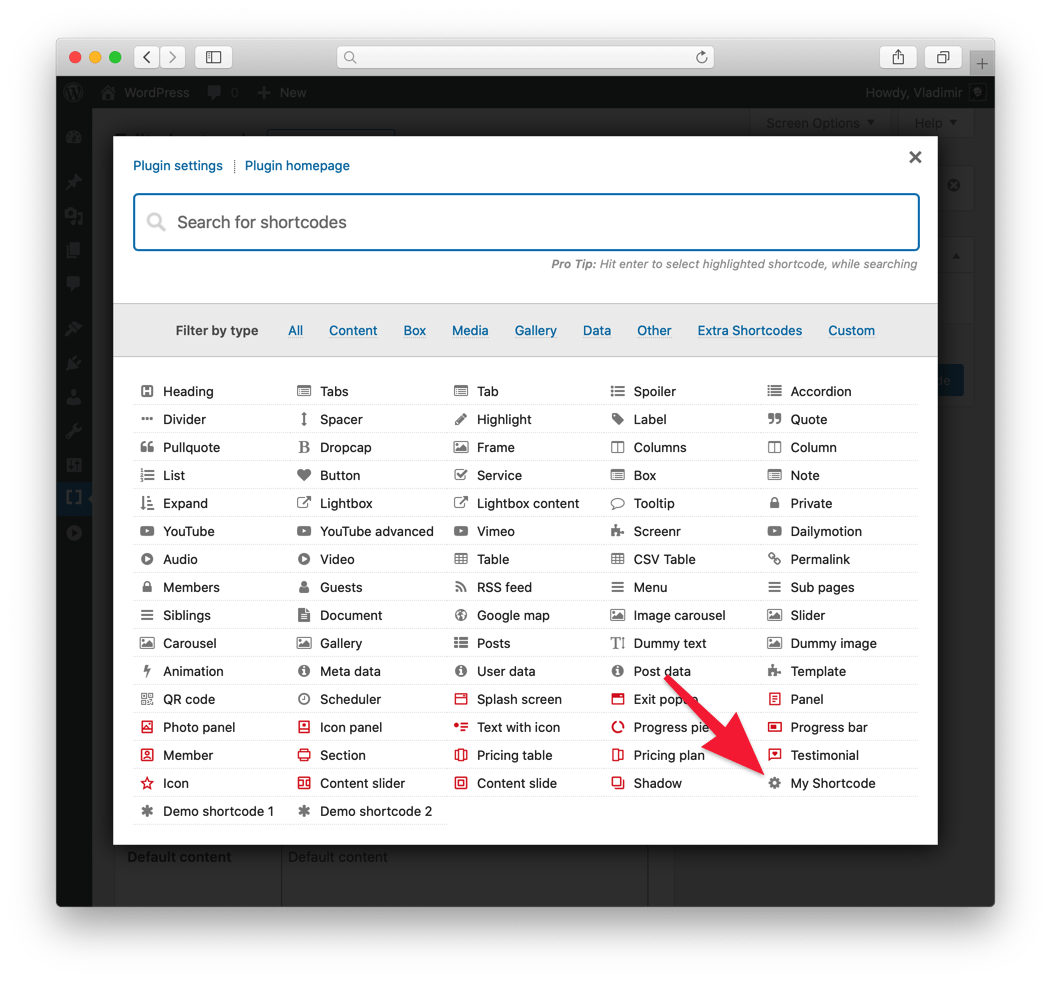
Navigate to Dashboard – Shortcodes – Custom shortcodes and click the Create shortcode button in the upper part of the screen.
Look for the Shortcode title field and give our new shortcode a name, for example, My Awesome Shortcode.
The Shortcode tag name field should be filled automatically.

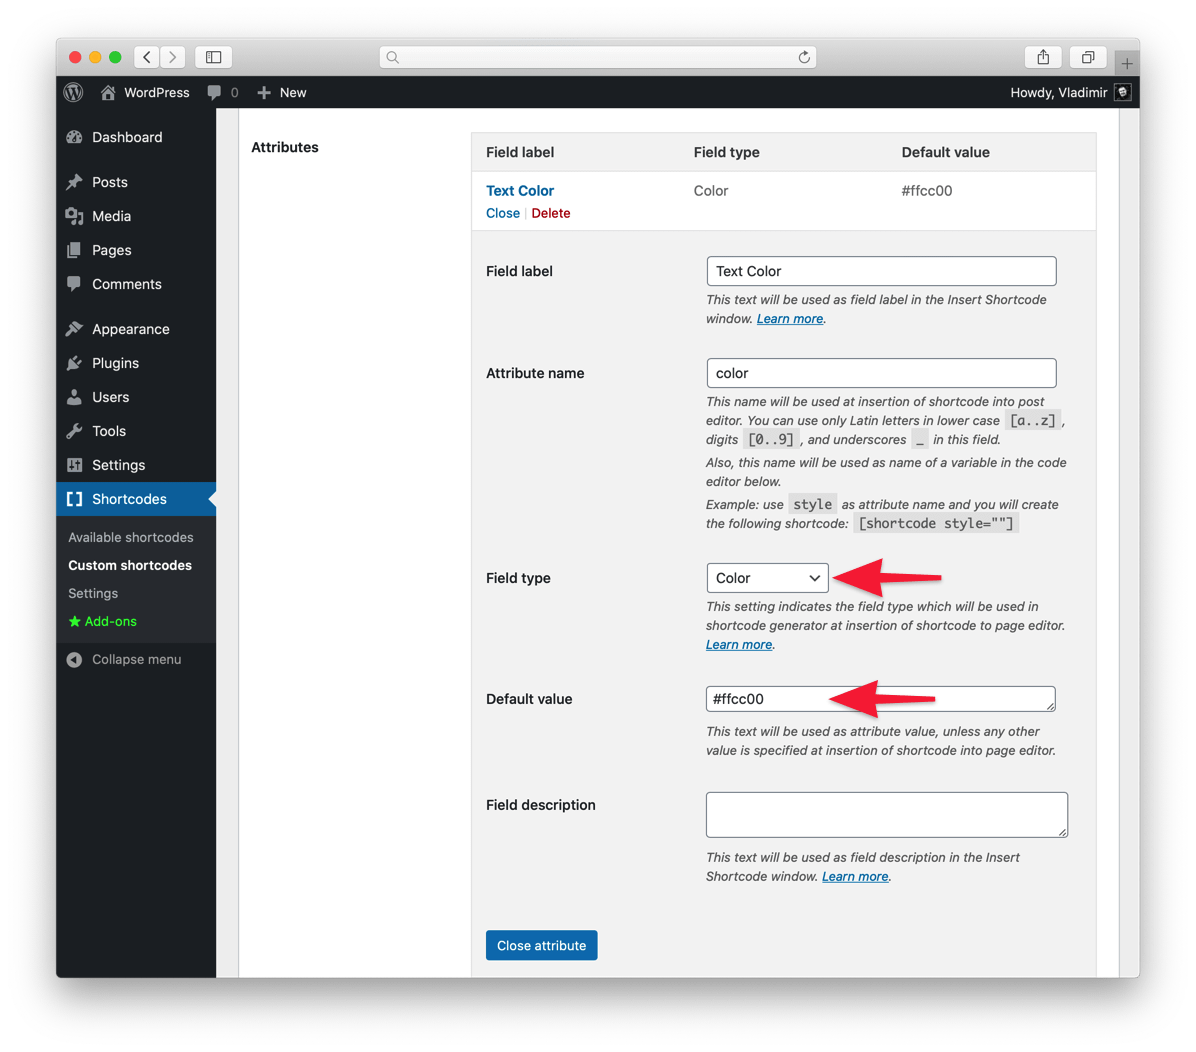
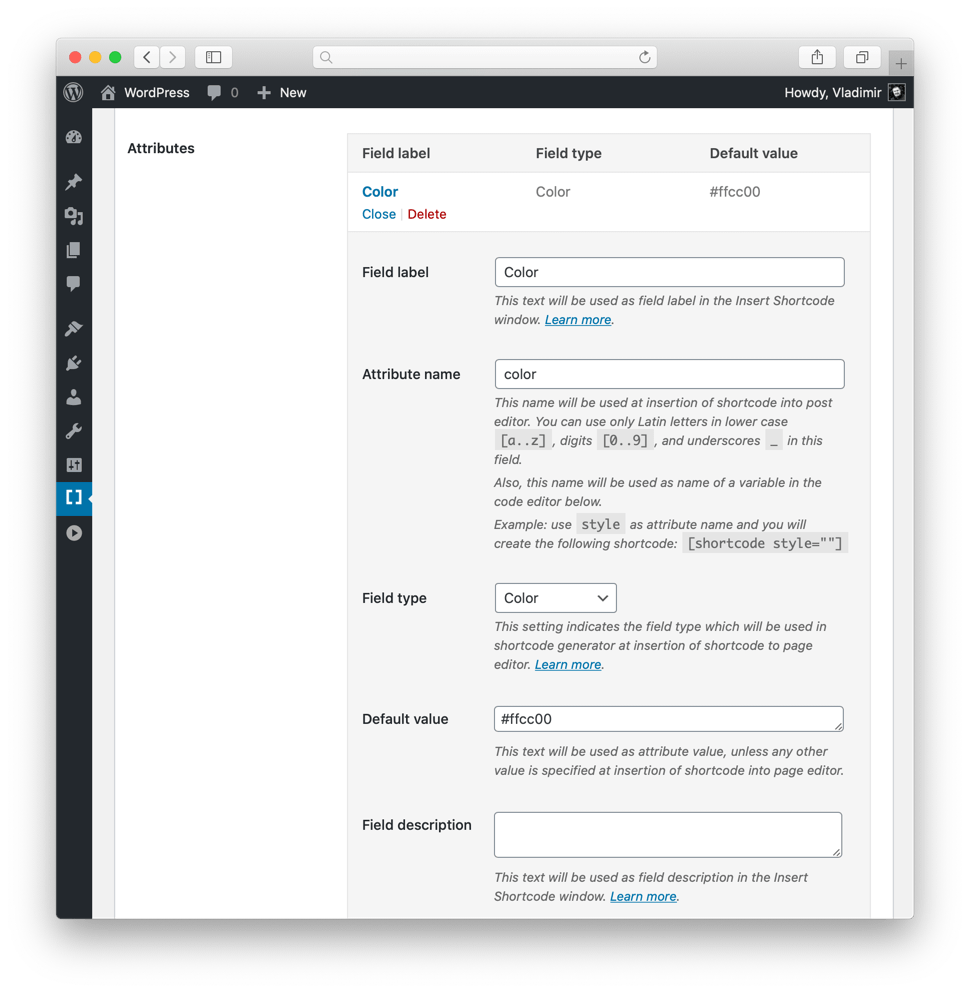
Step 2: Create an attribute
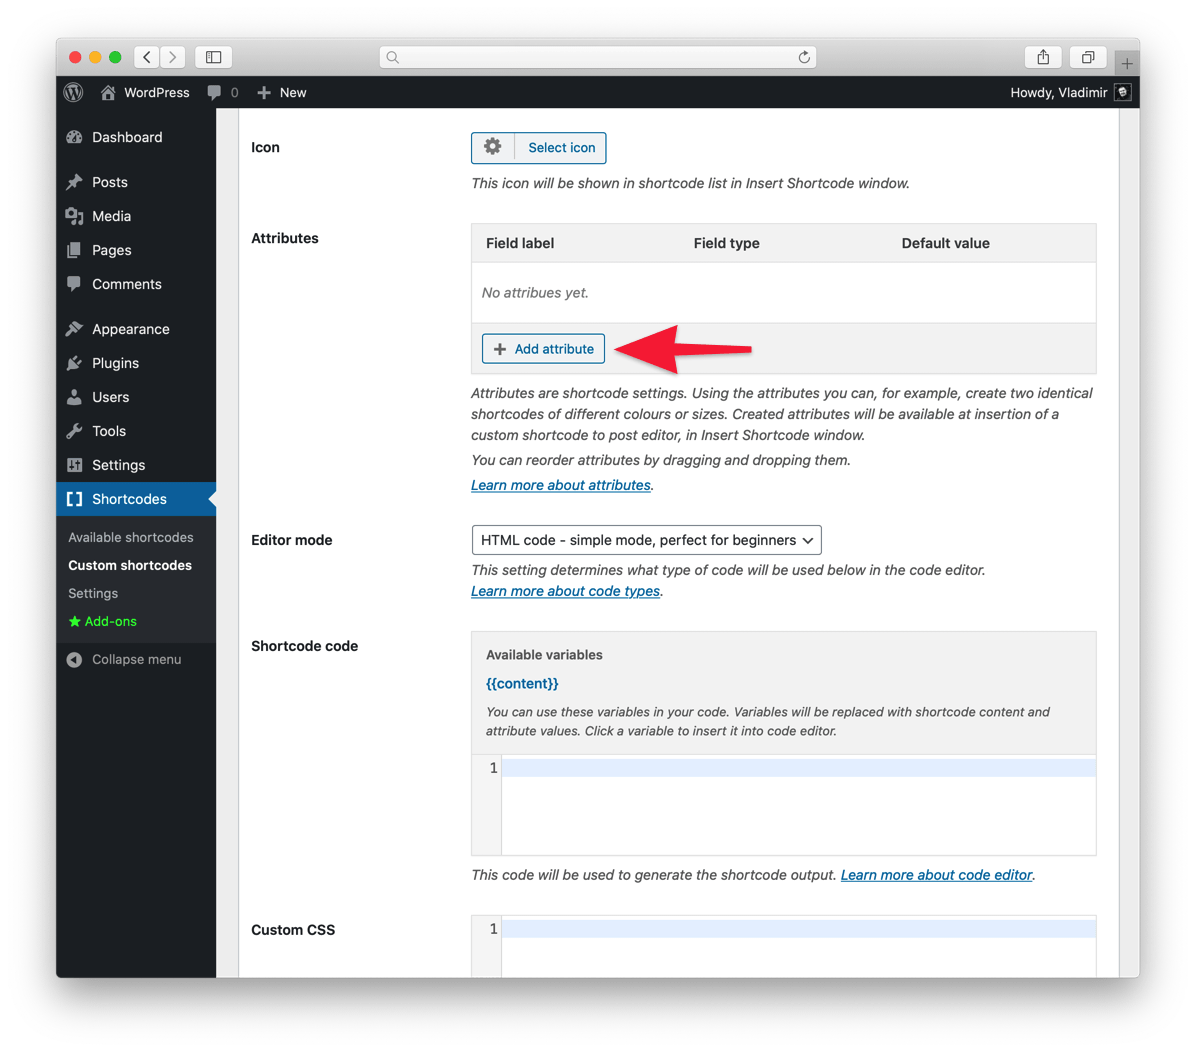
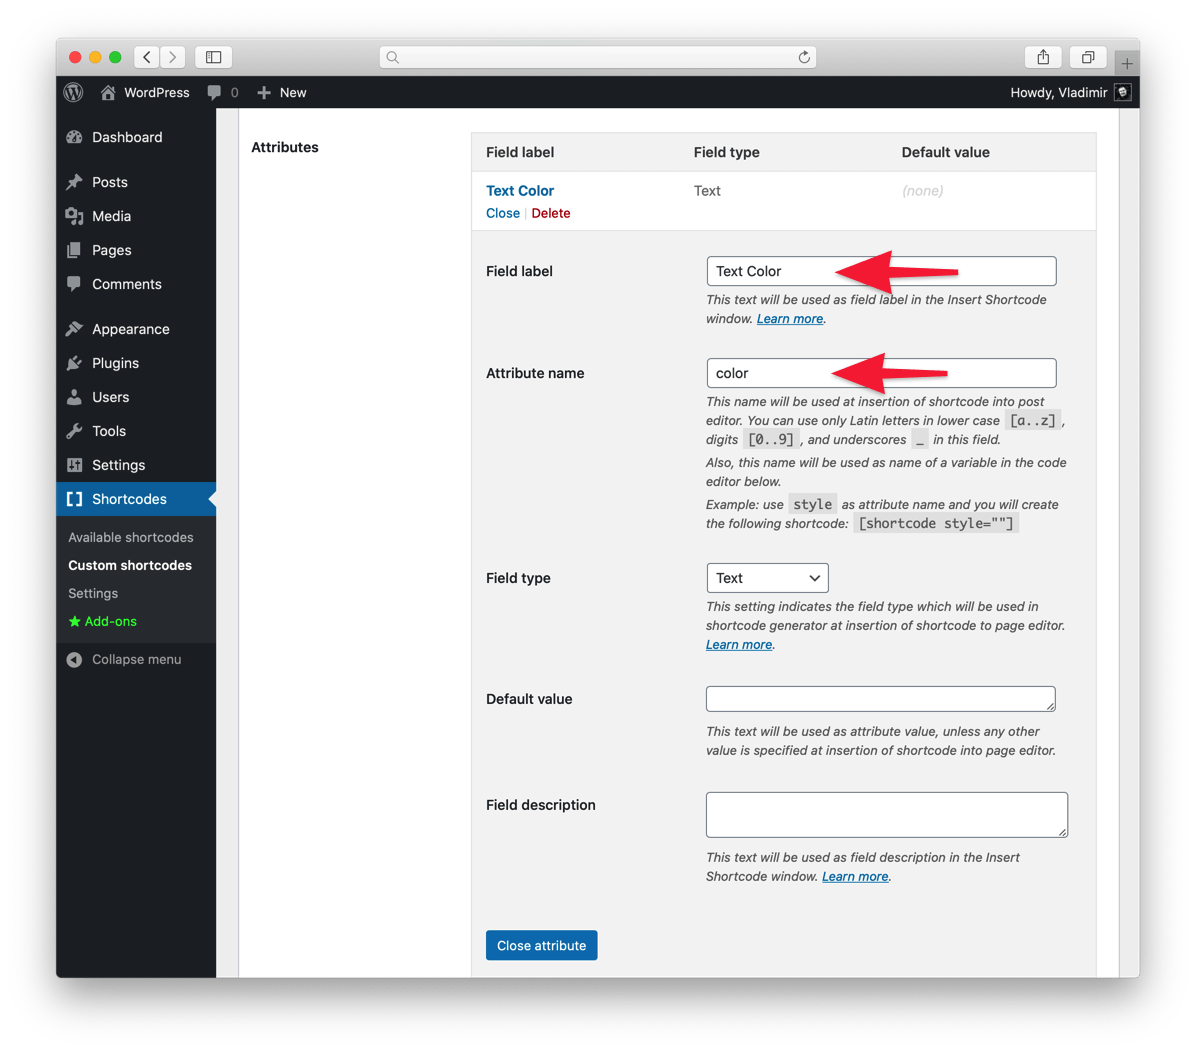
Scroll the page down and look for the Attributes section. Click on the Add attribute button to create a new attribute for our shortcode.
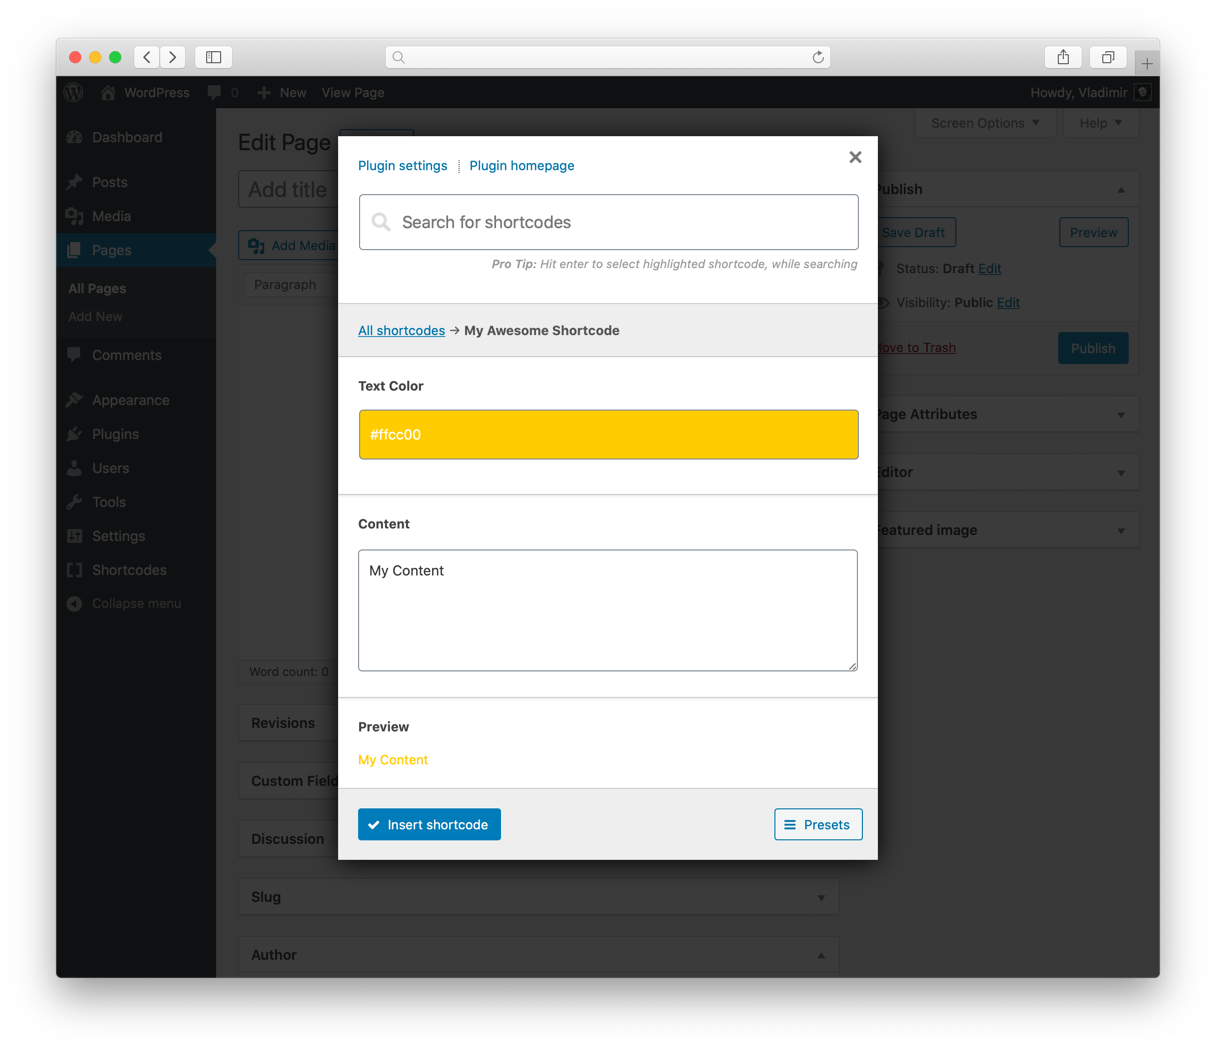
Set the Field label to Text Color and Attribute name to color.
Now let’s change the field type. This option defines how our new attribute will look in the shortcode generator (the Insert shortcode window). Set the Field type to Color and Default value to #ffcc00.
Click the Close attribute button and go to Step 3.

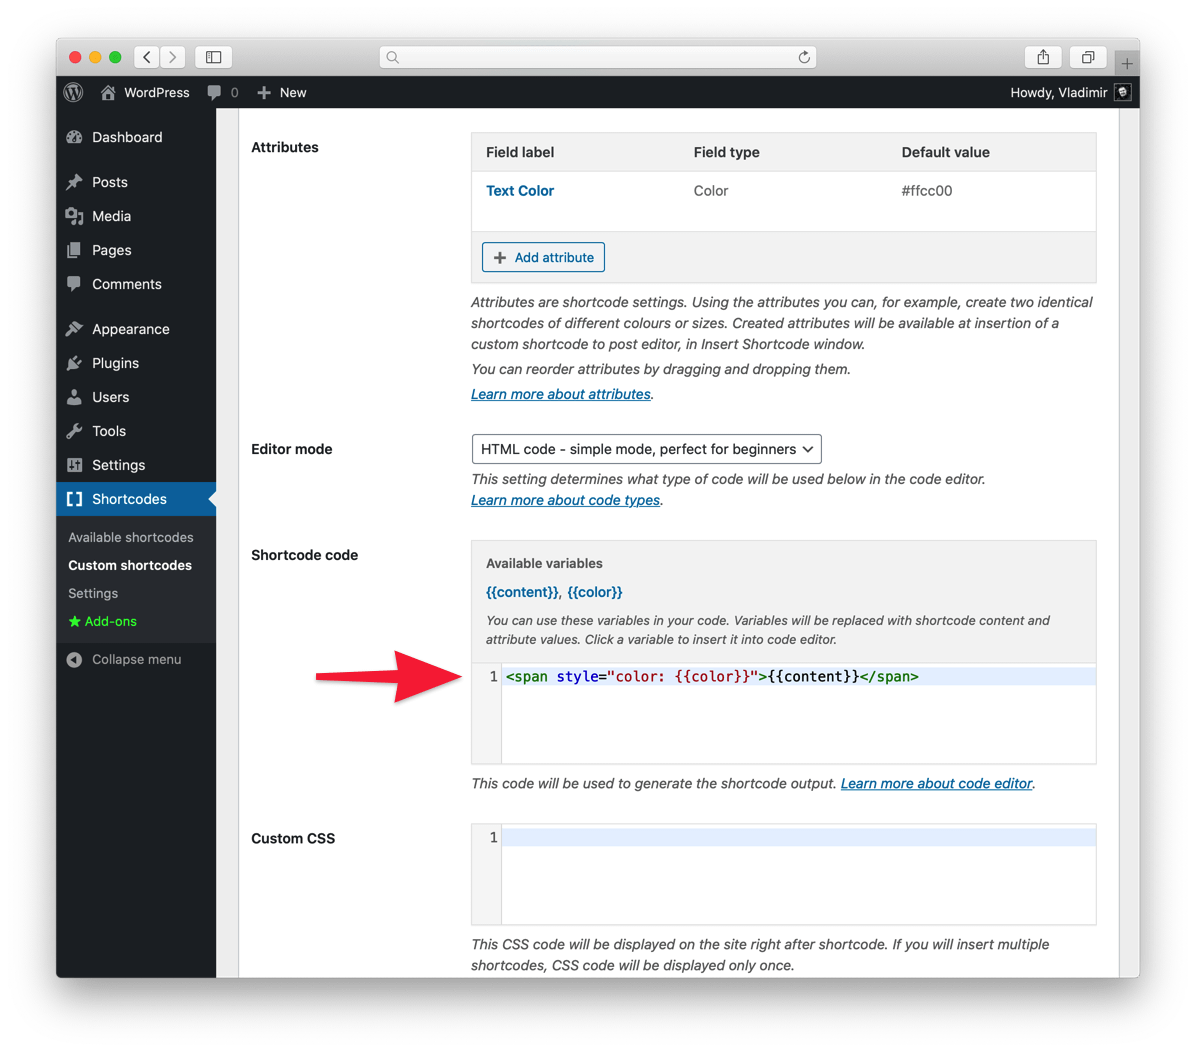
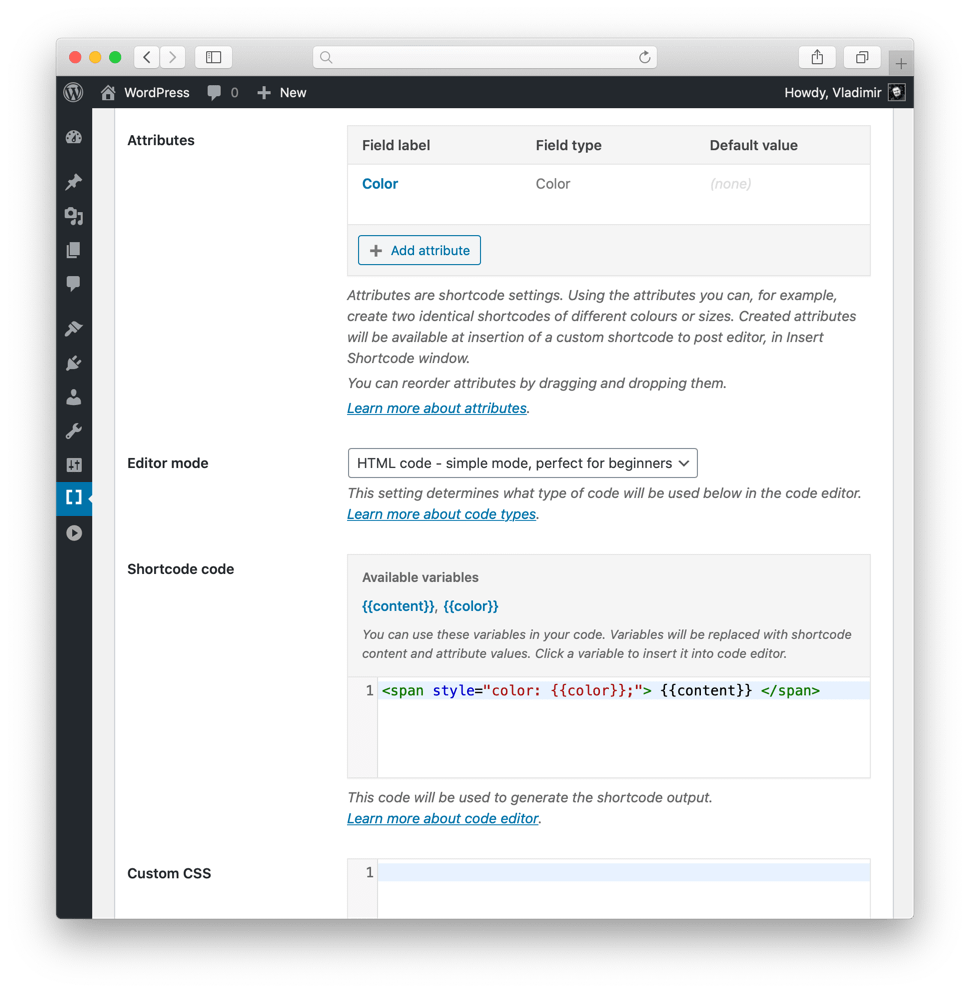
Step 3: The code
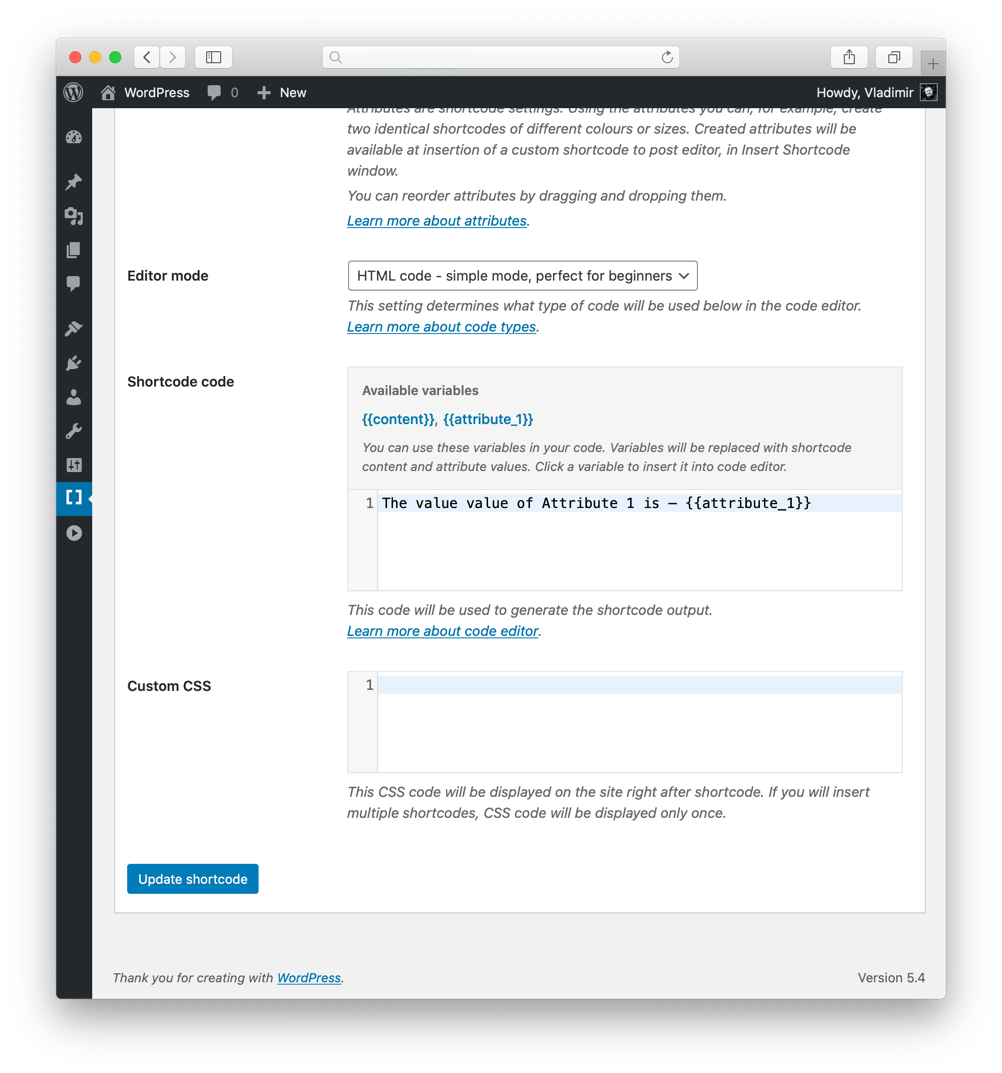
Now, when our shortcode is defined, let’s write some code. The code, that will be used to display the shortcode in posts or pages.
Scroll the page down and look for the Editor mode field. This mode defines what type of code we can use. We’ll leave the editor in HTML mode.
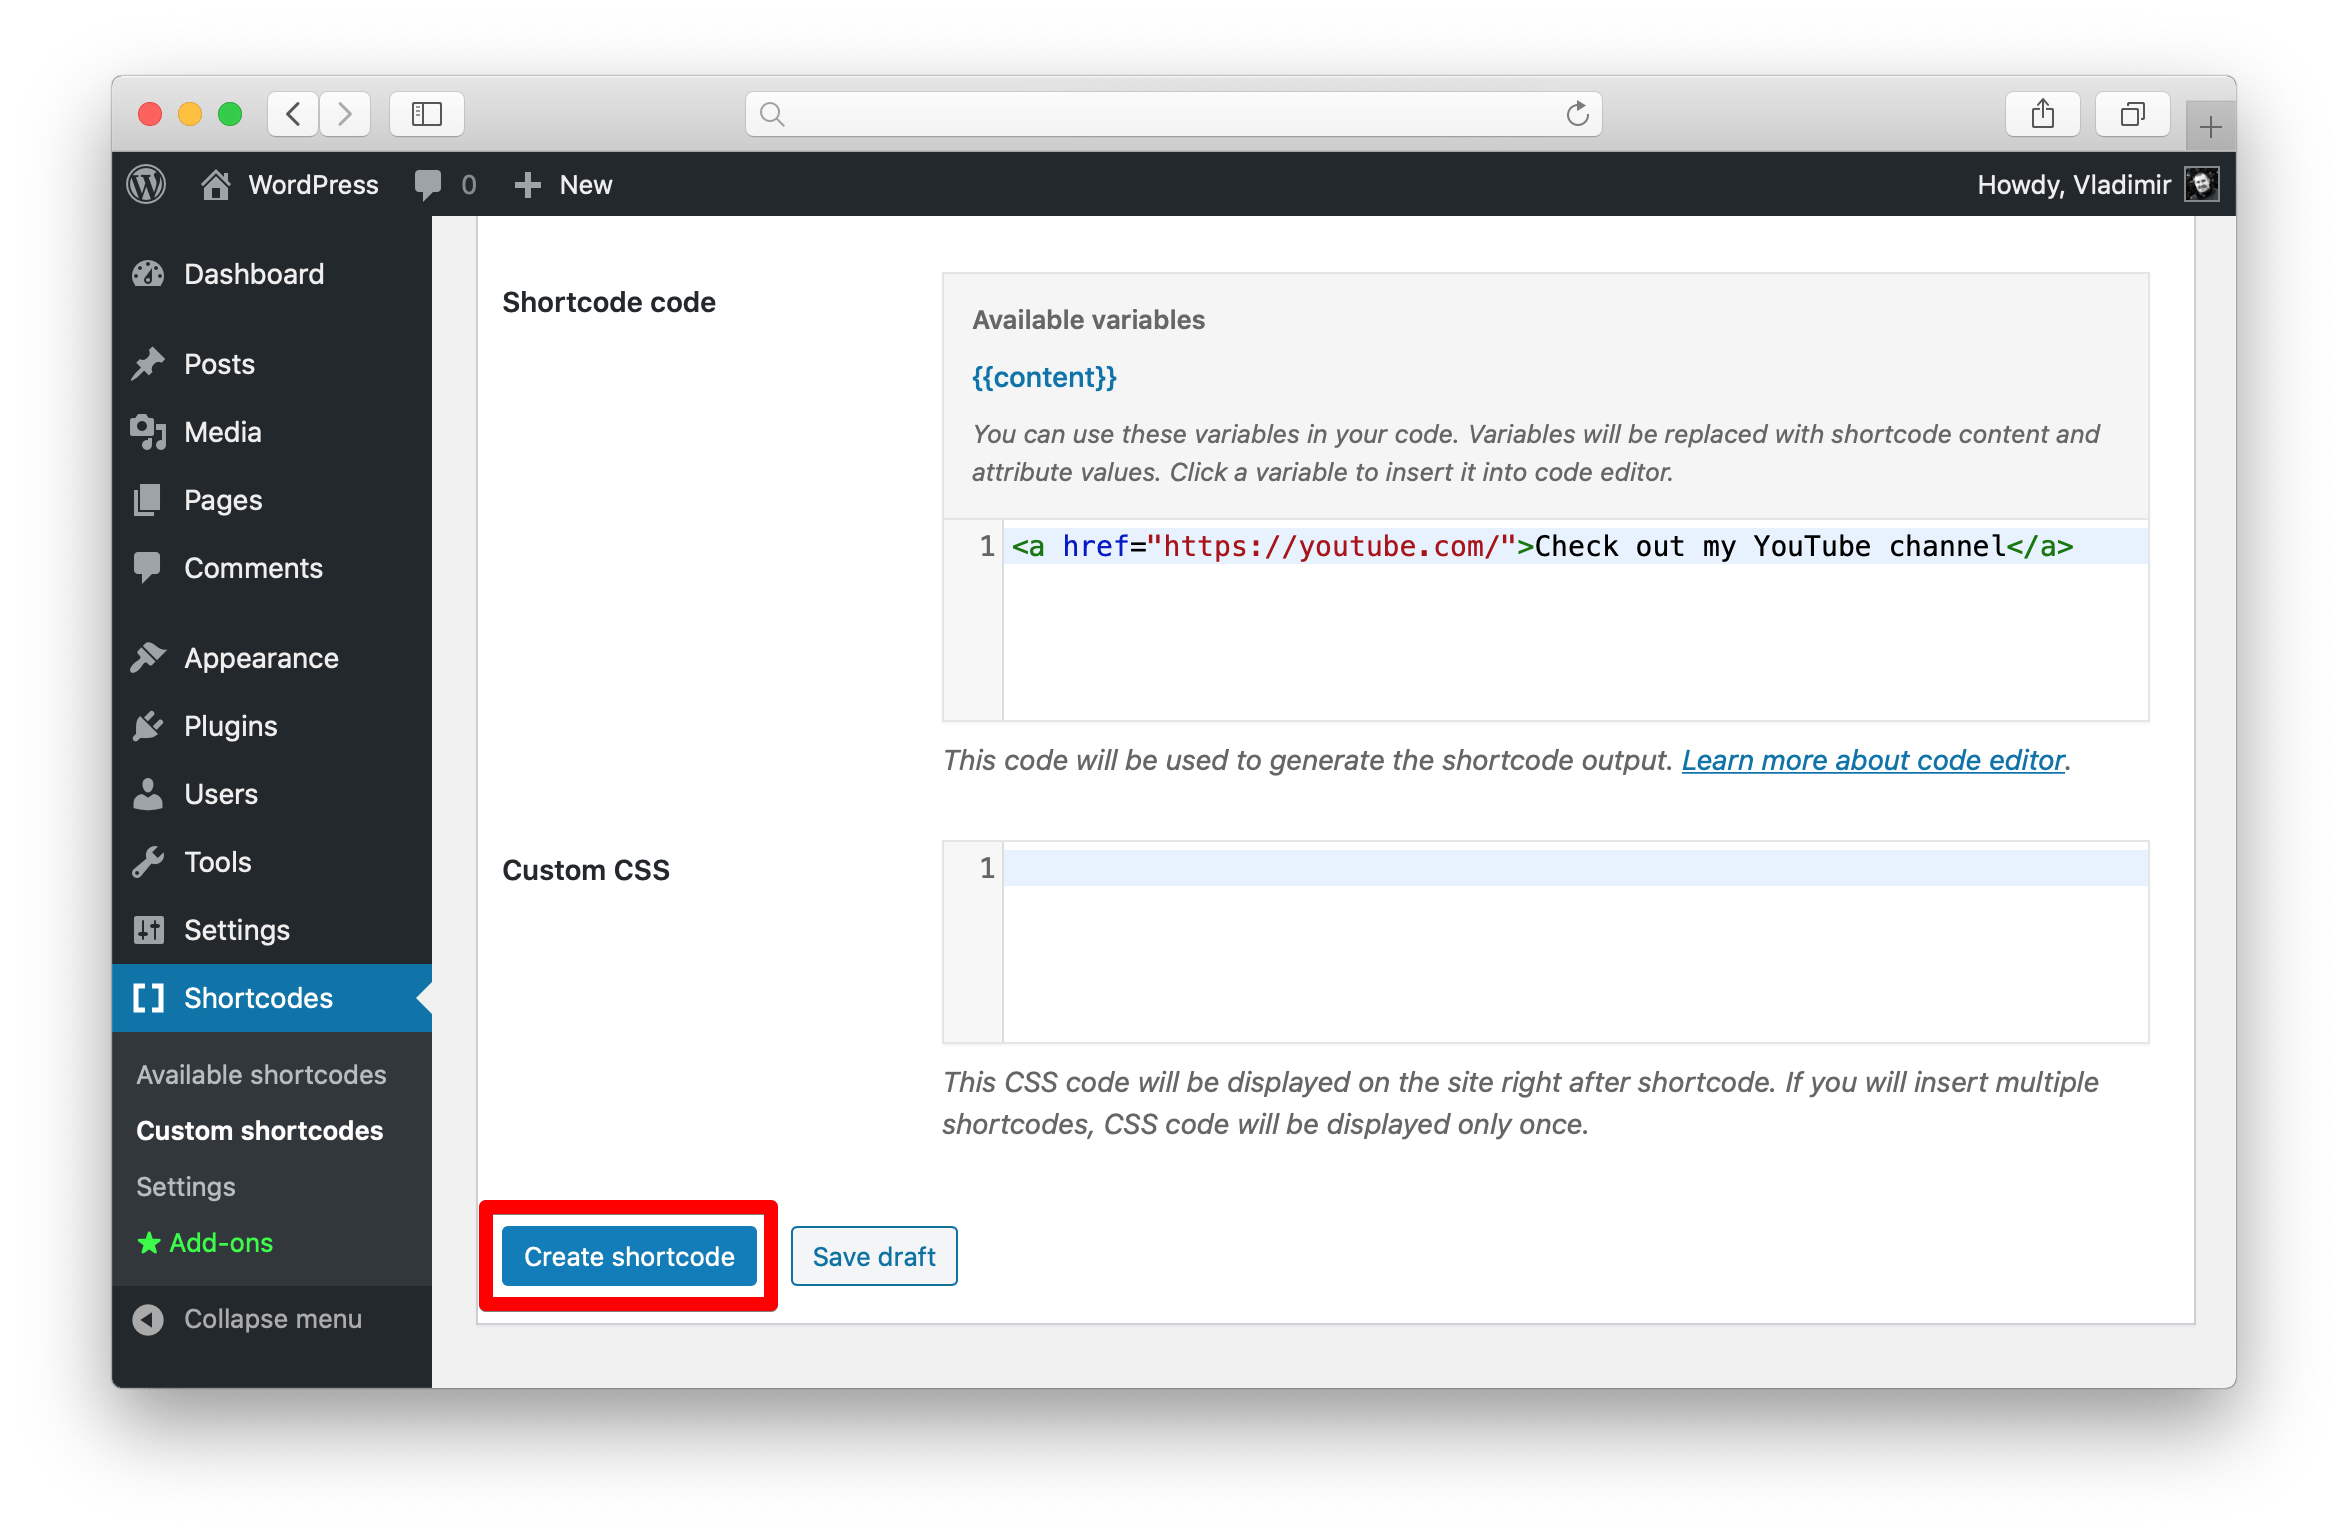
Add the following snippet to the Shortcode code field:
<span style="color: {{color}}">{{content}}</span>- {{color}} – is the name of our attribute wrapped with double curly braces, remember the Attribute name field from Step 2?
- {{content}} – is a special variable, that will be replaced with our shortcode content (the content between the opening and closing shortcode tags).
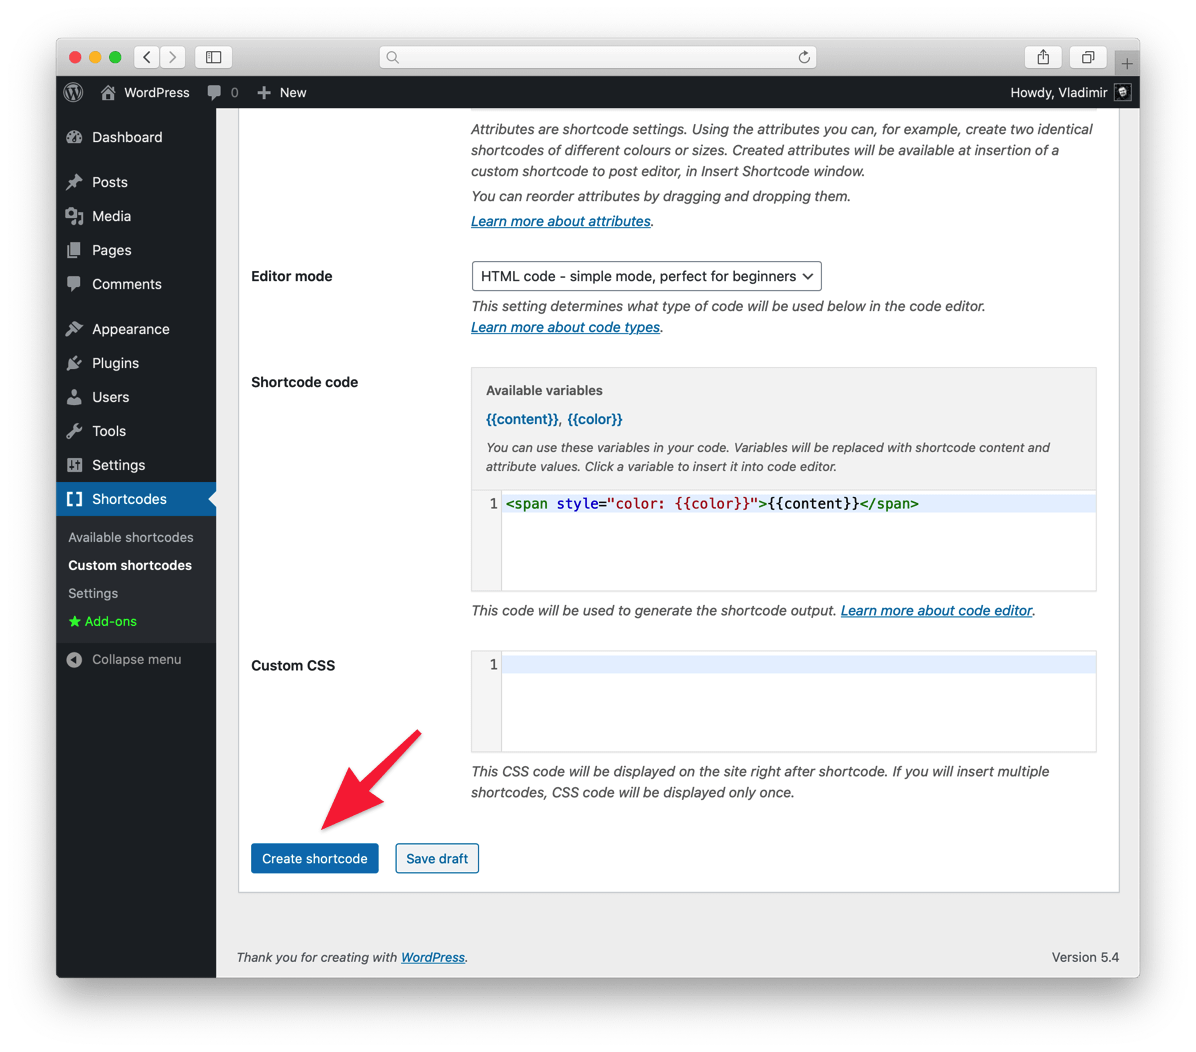
Click the Create shortcode button.
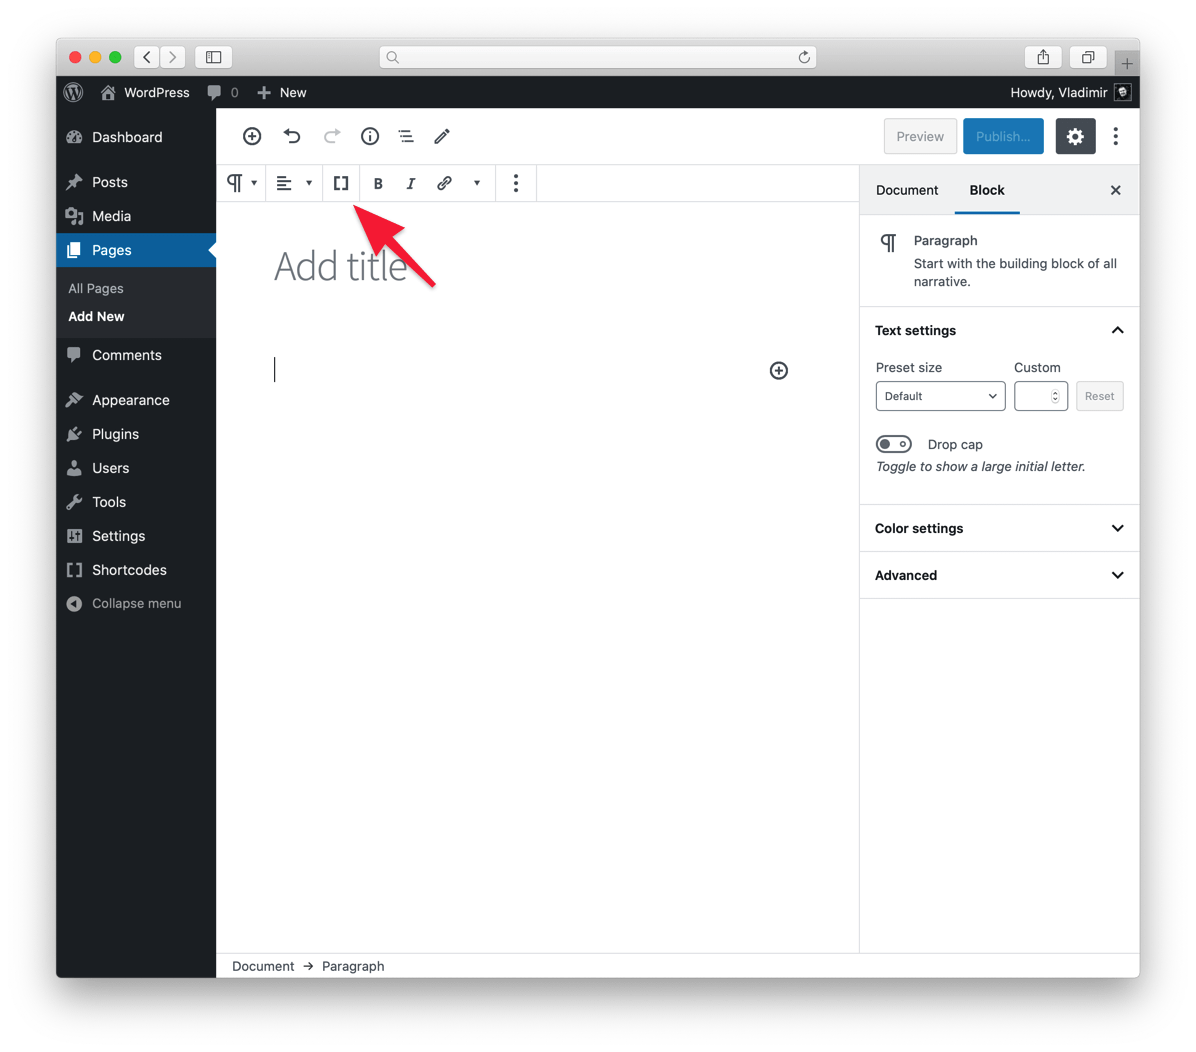
Step 4: Time to use the shortcode
Now, we’re all set and can use the freshly created shortcode.
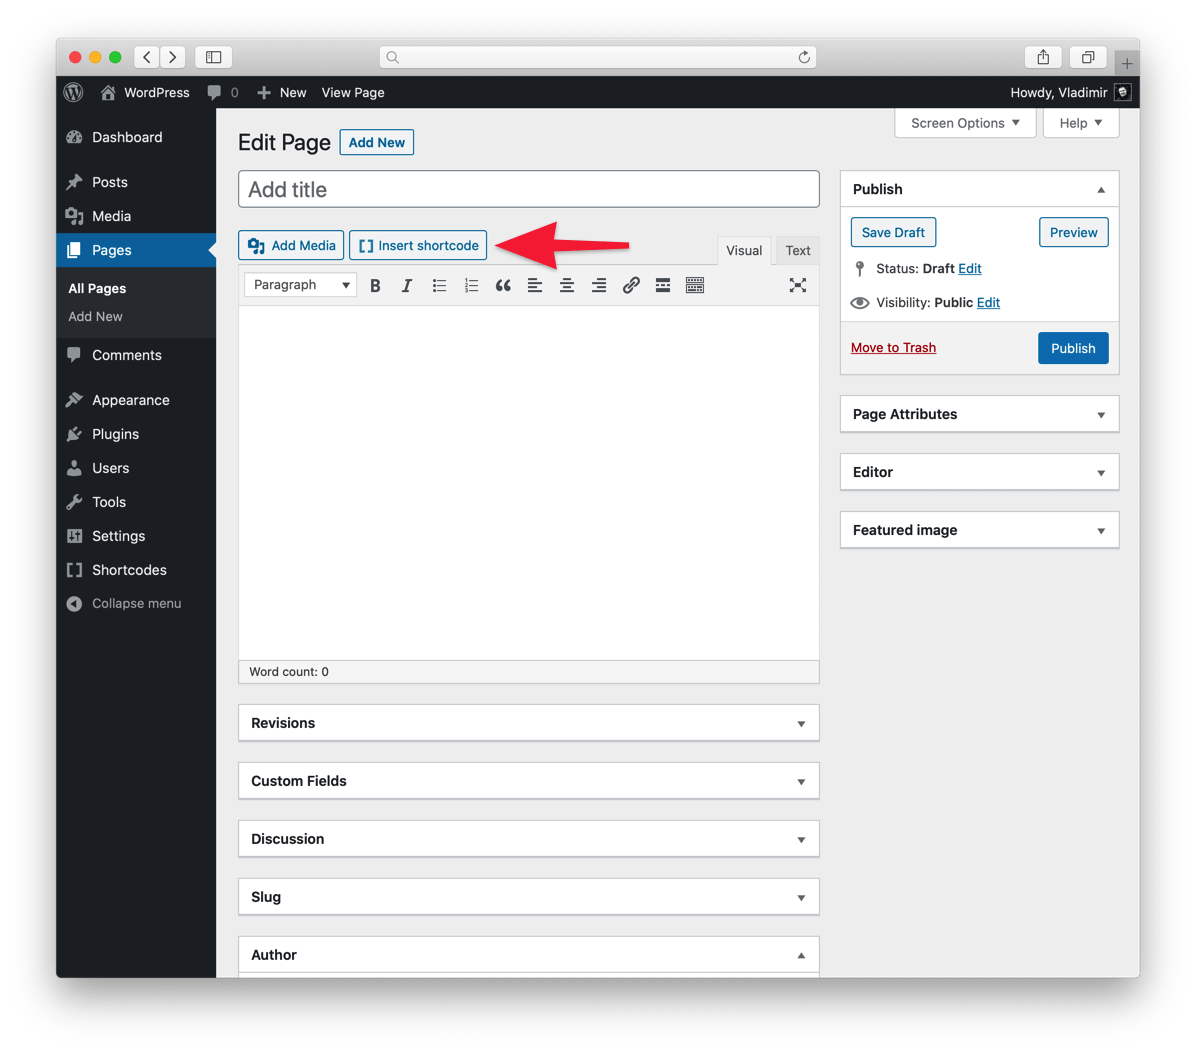
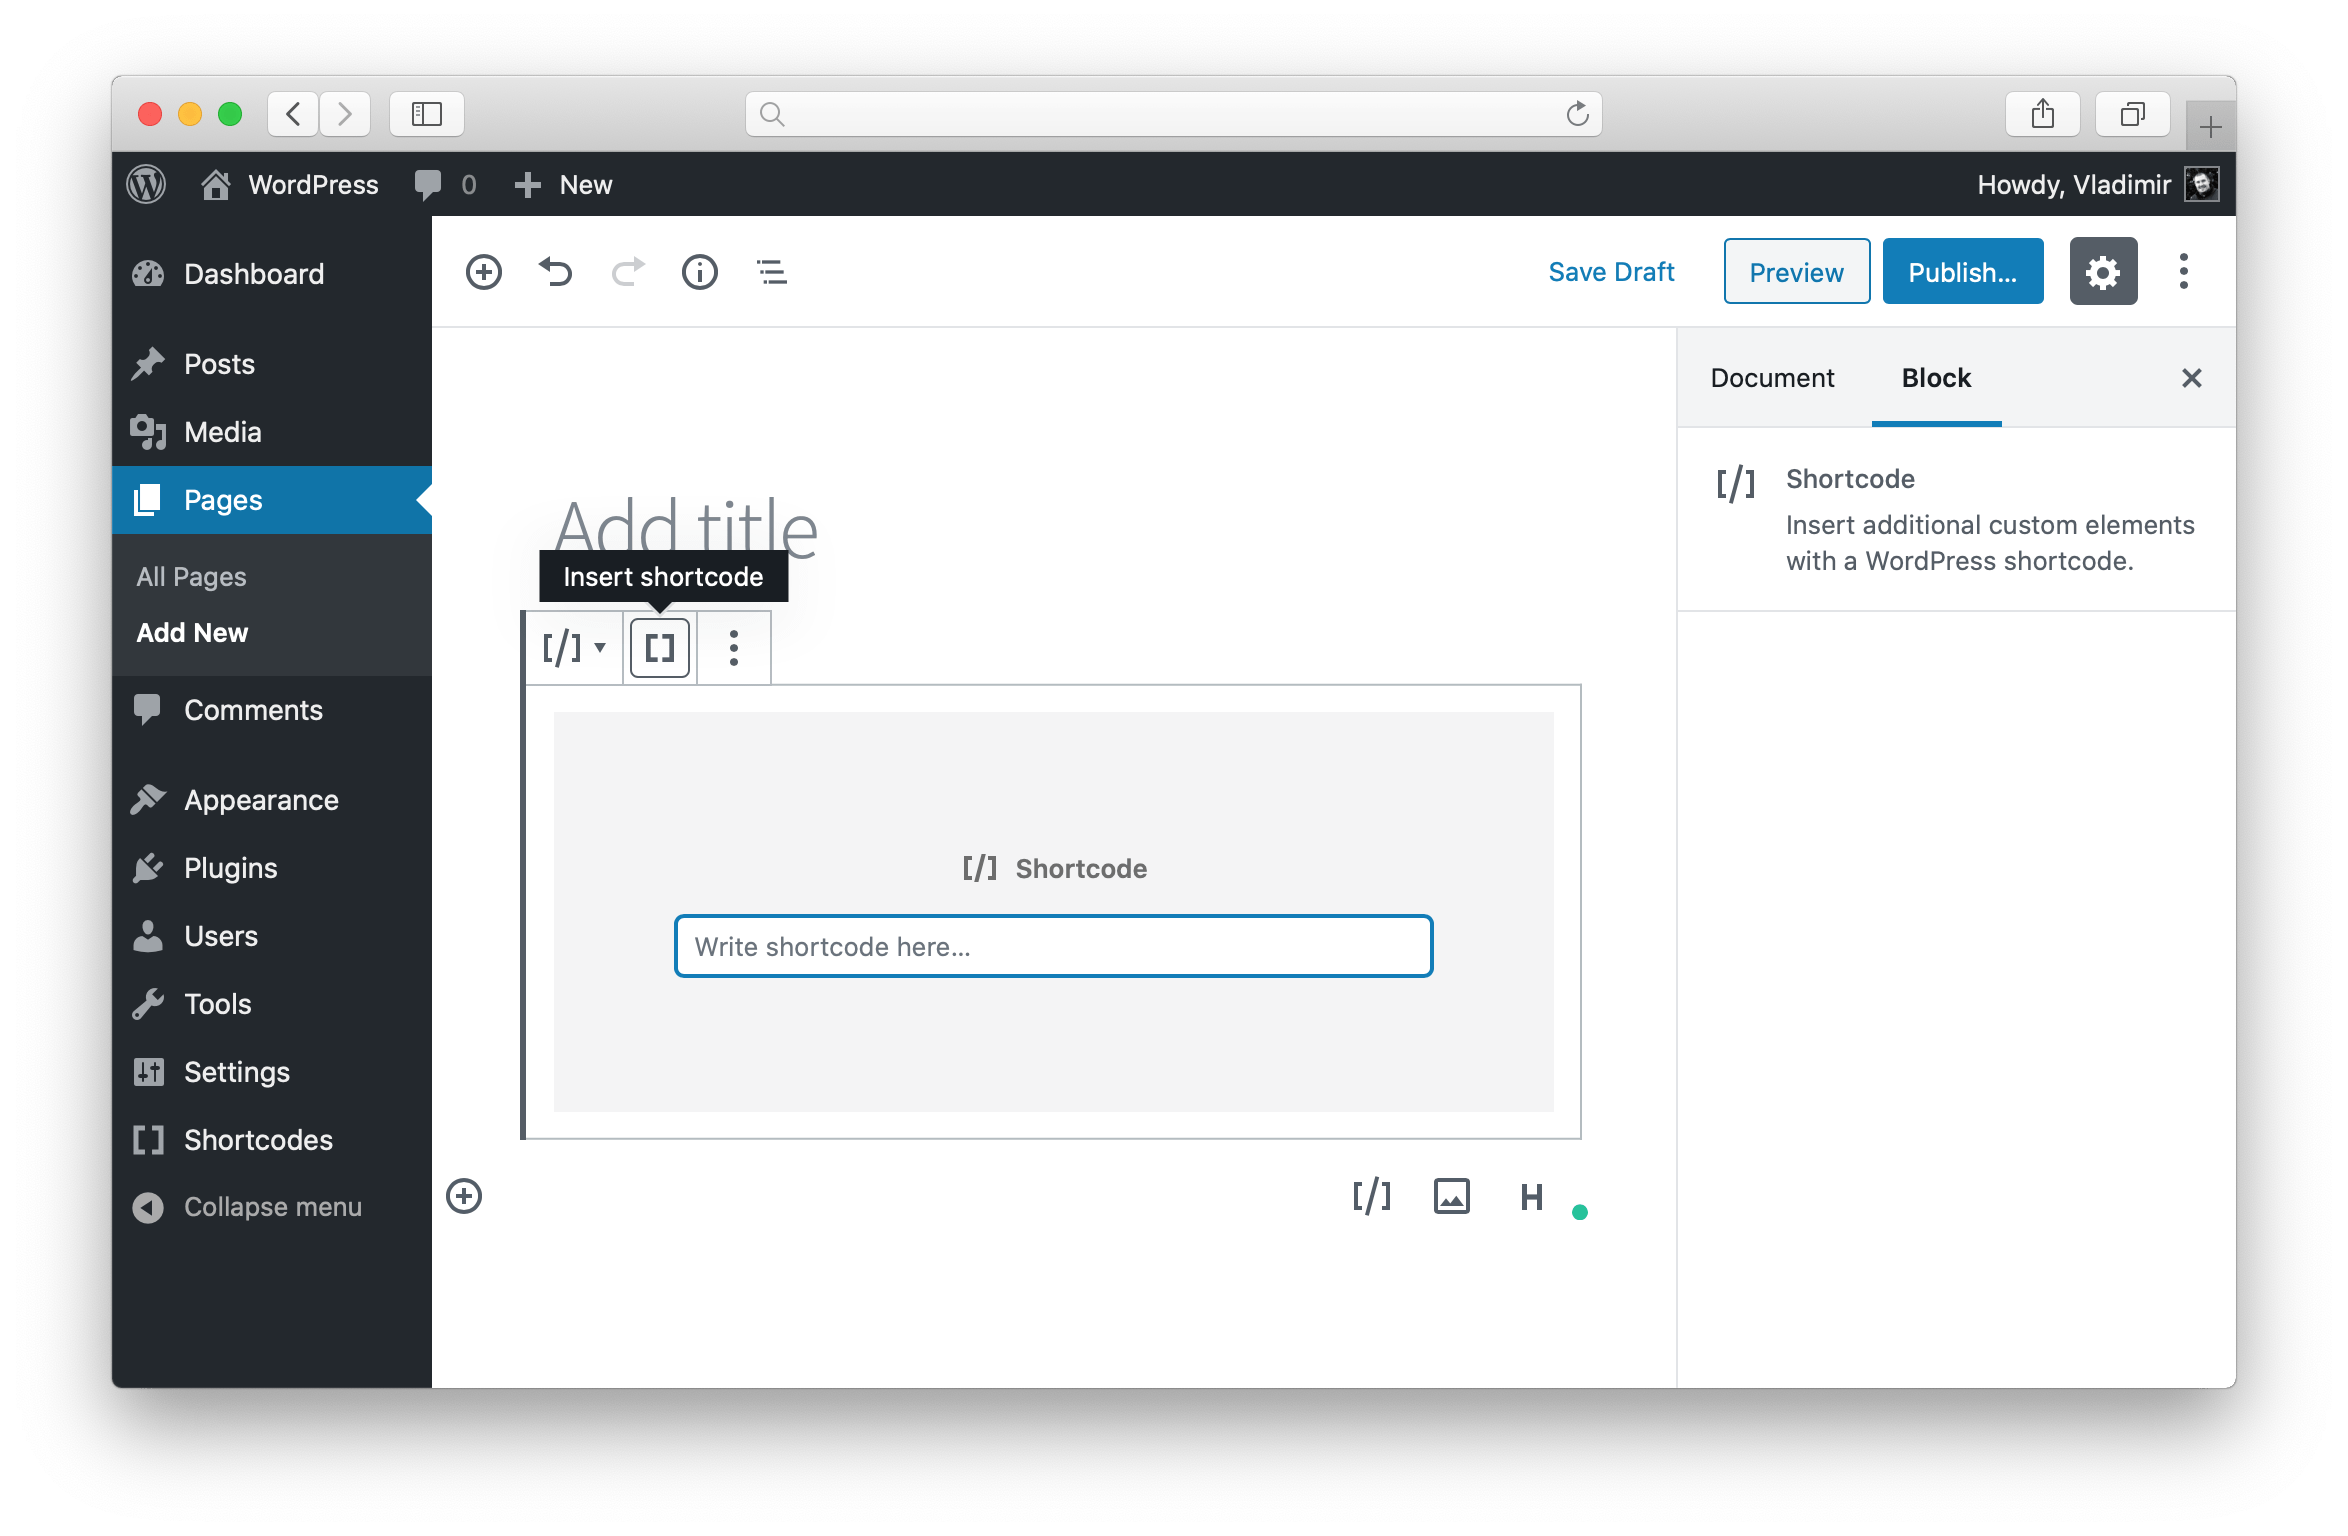
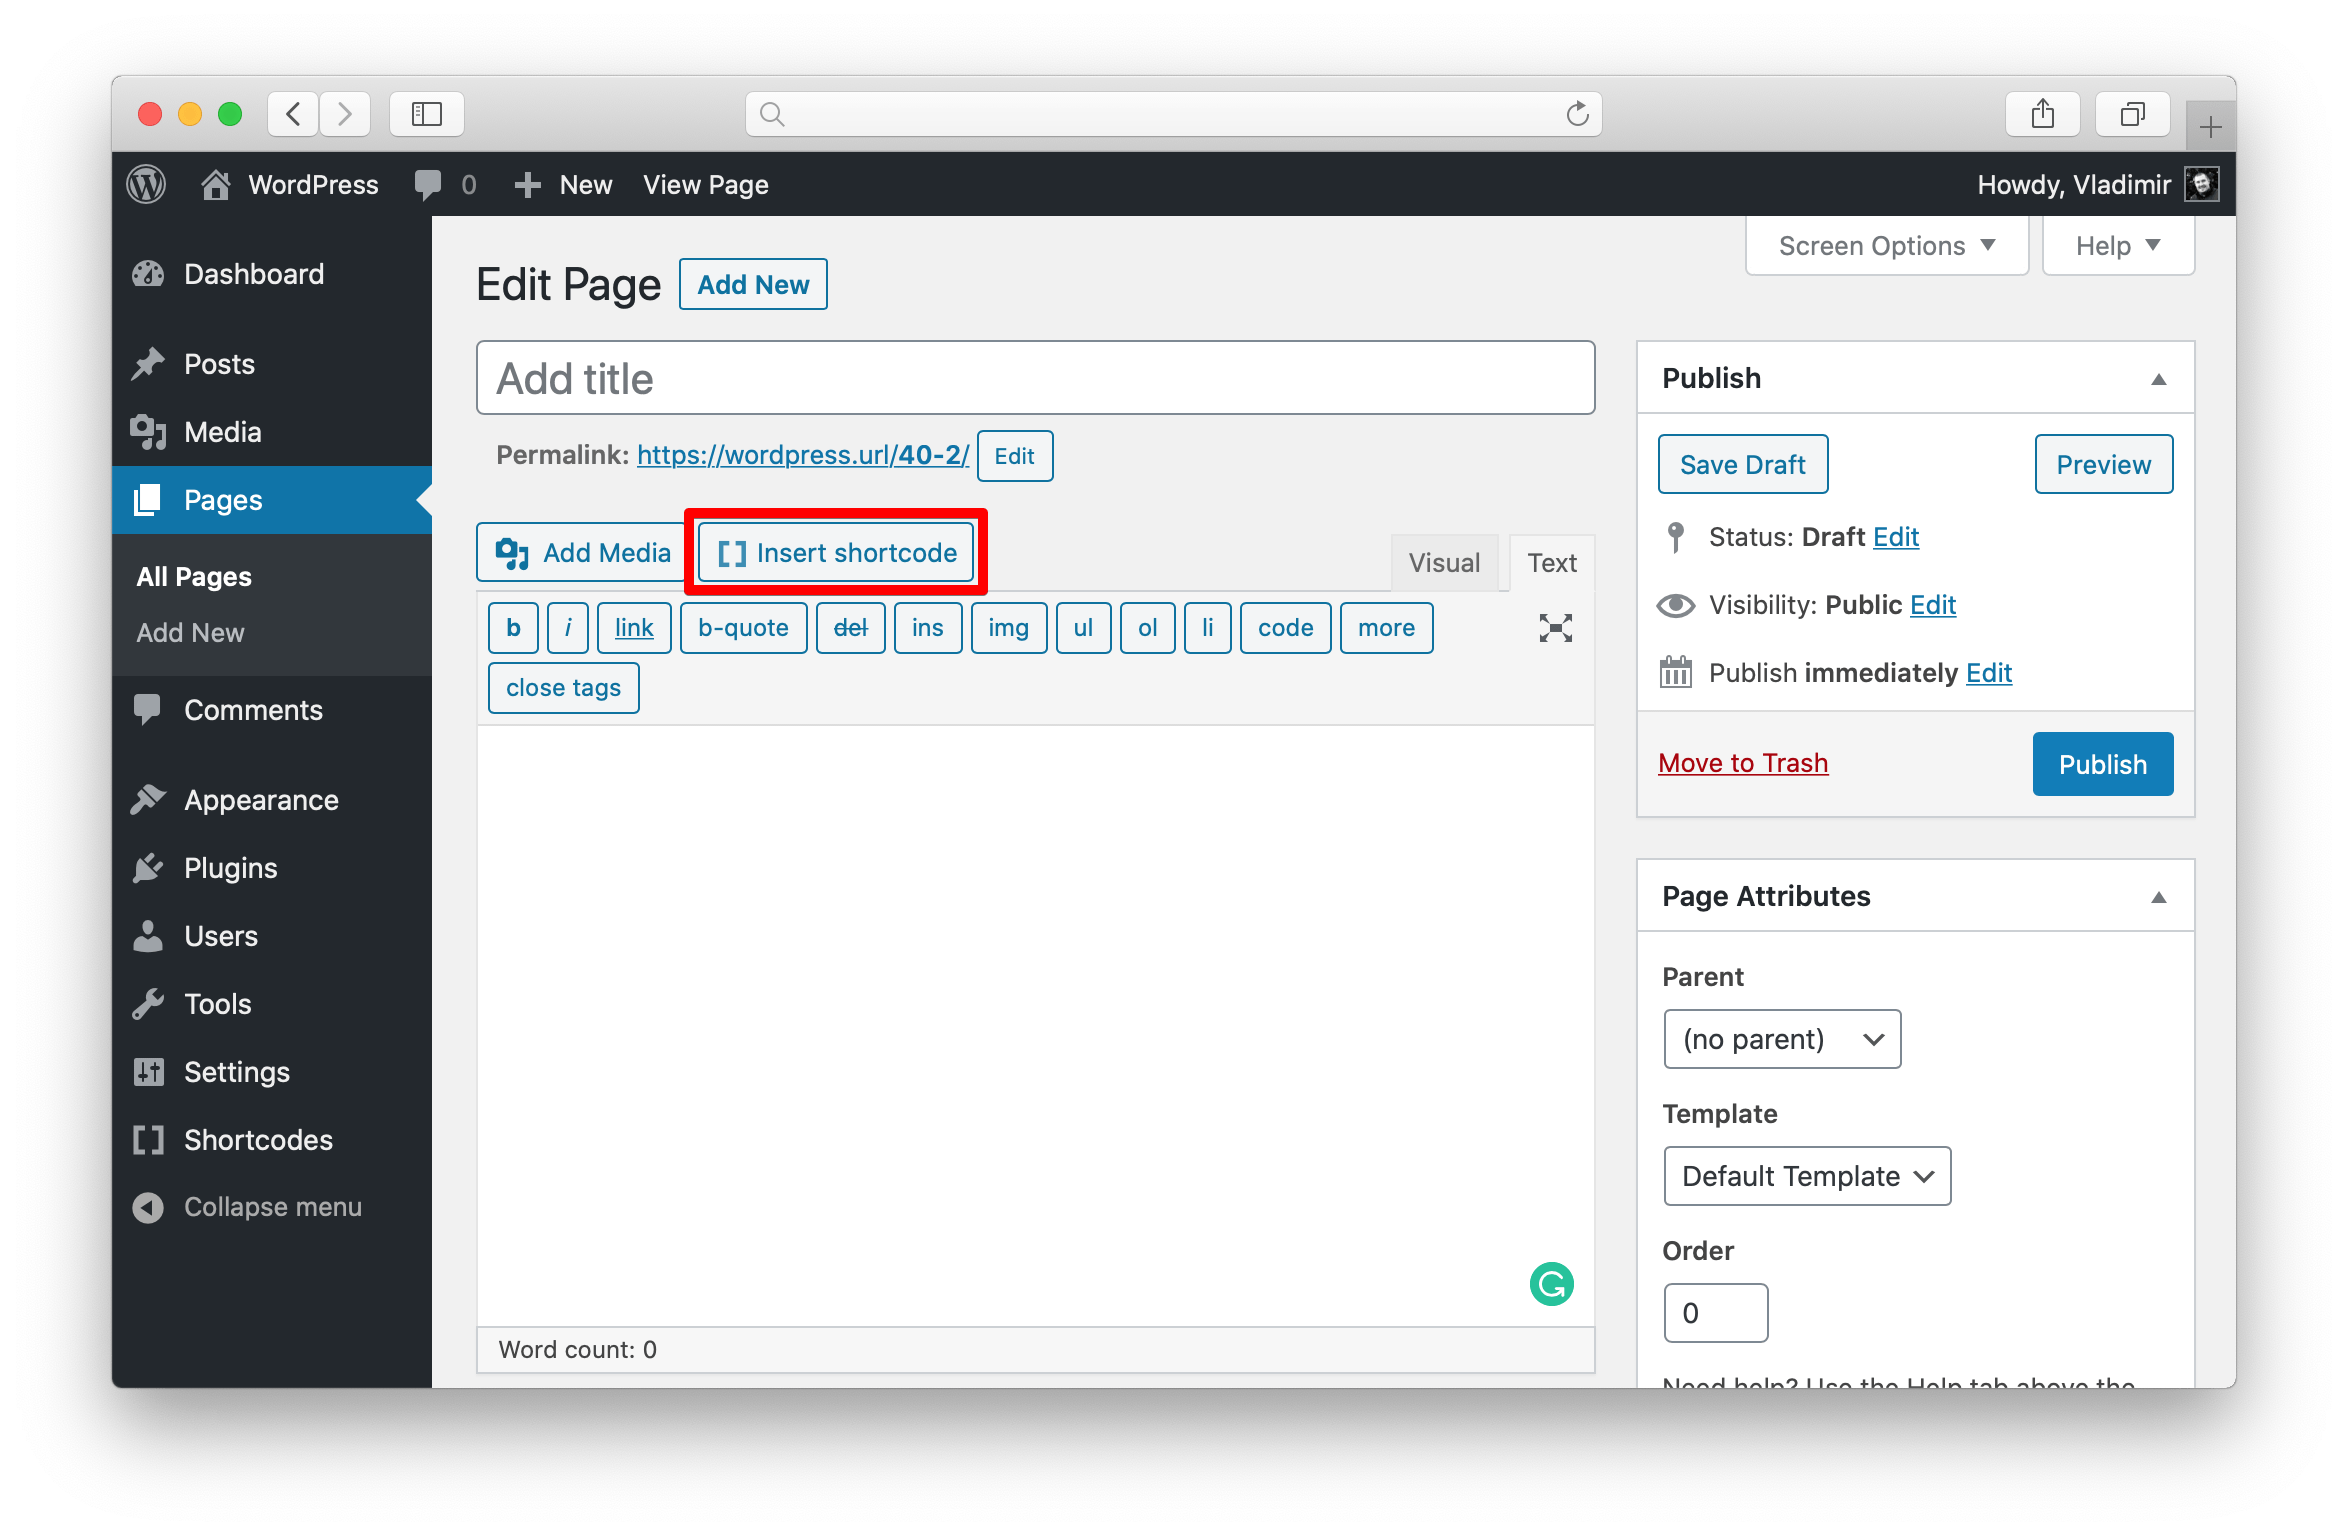
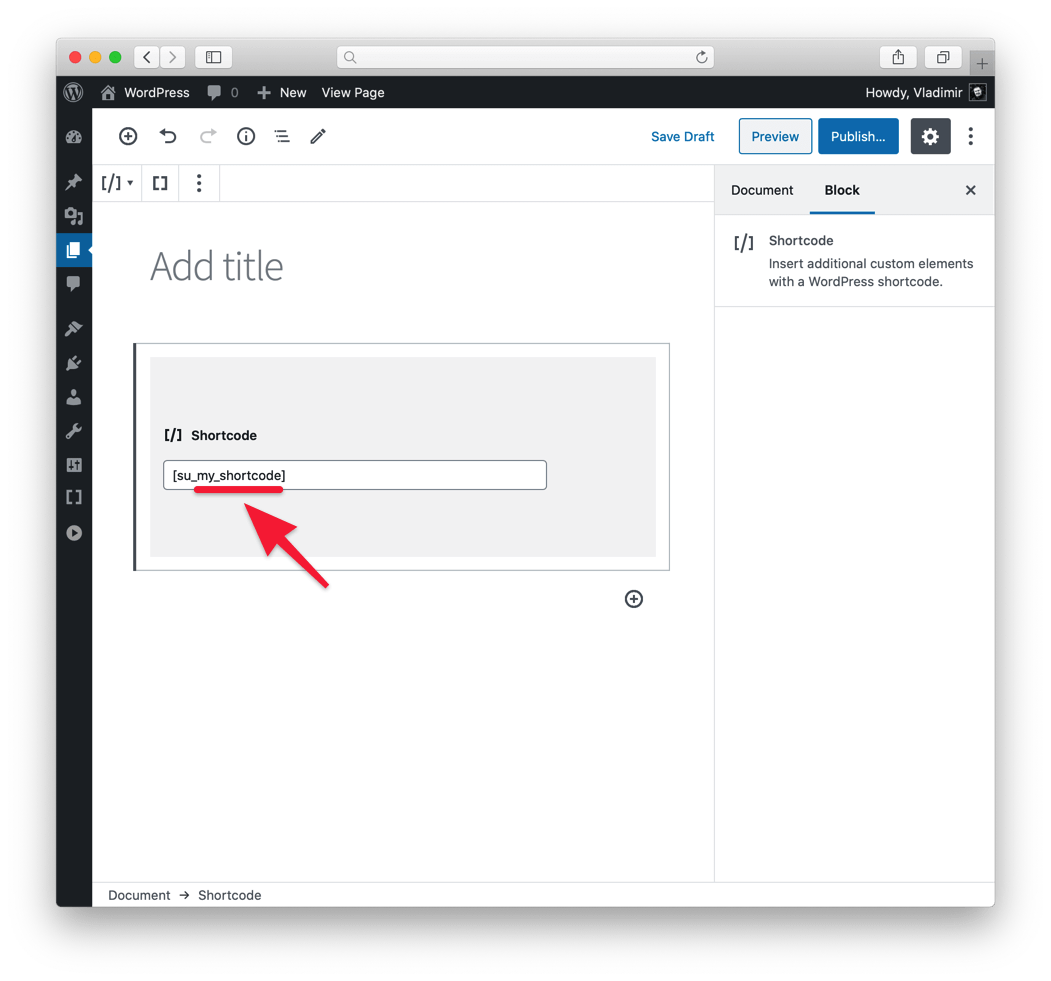
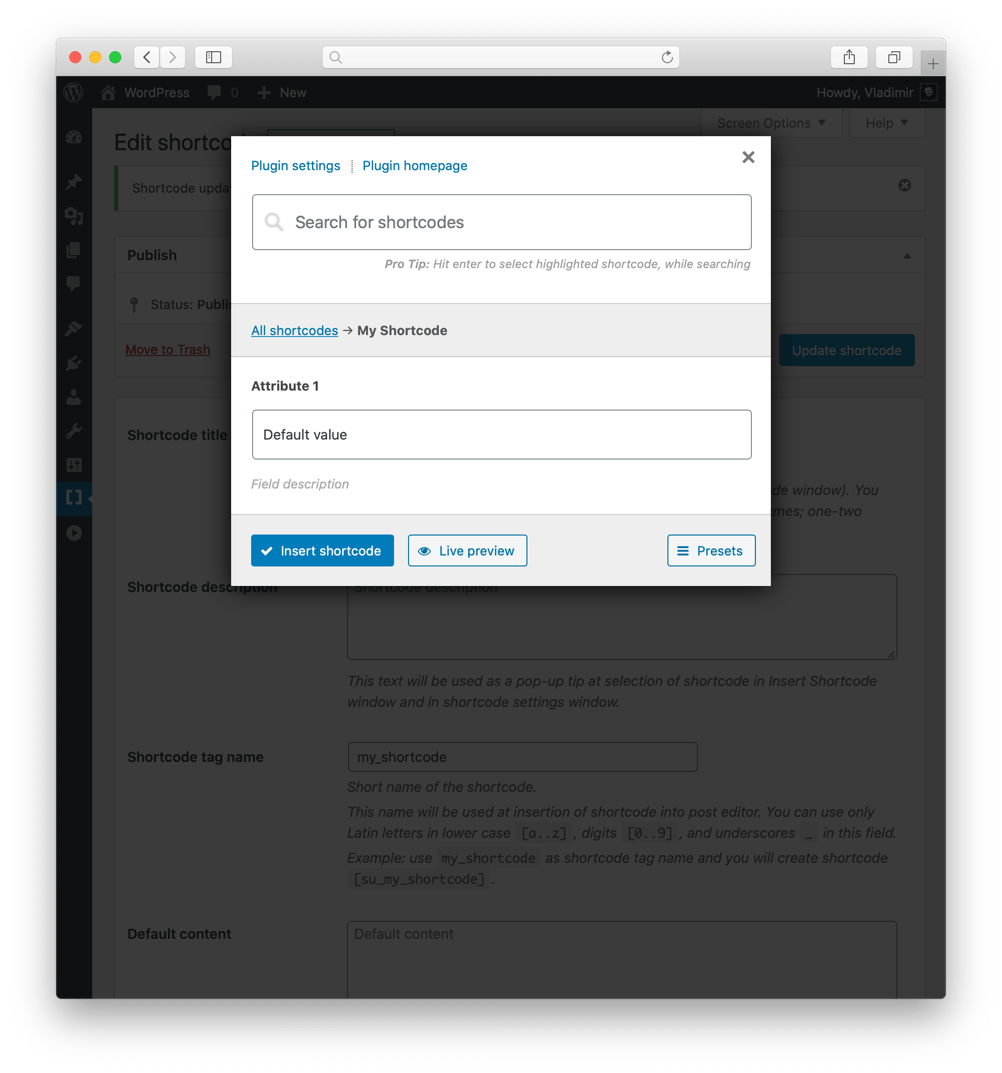
Navigate to Dashboard – Pages – Add New and click the Insert shortcode button. Depending on the editor you use, the Insert shortcode button may look different.
Look for the new shortcode in the list. Our shortcode should be appended at the very end.
That’s it, you can insert the shortcode anywhere you need it.

Creating a content placeholder
Shortcode Creator can be used for creating dynamic content placeholders, which you can add to multiple posts or pages and edit content from a single place. Follow the instructions below to create one.
Step 1: Create a new placeholder
Navigate to Dashboard – Shortcodes – Custom shortcodes and click the Create shortcode button to create a new custom shortcode.

Step 2: Give the placeholder a name
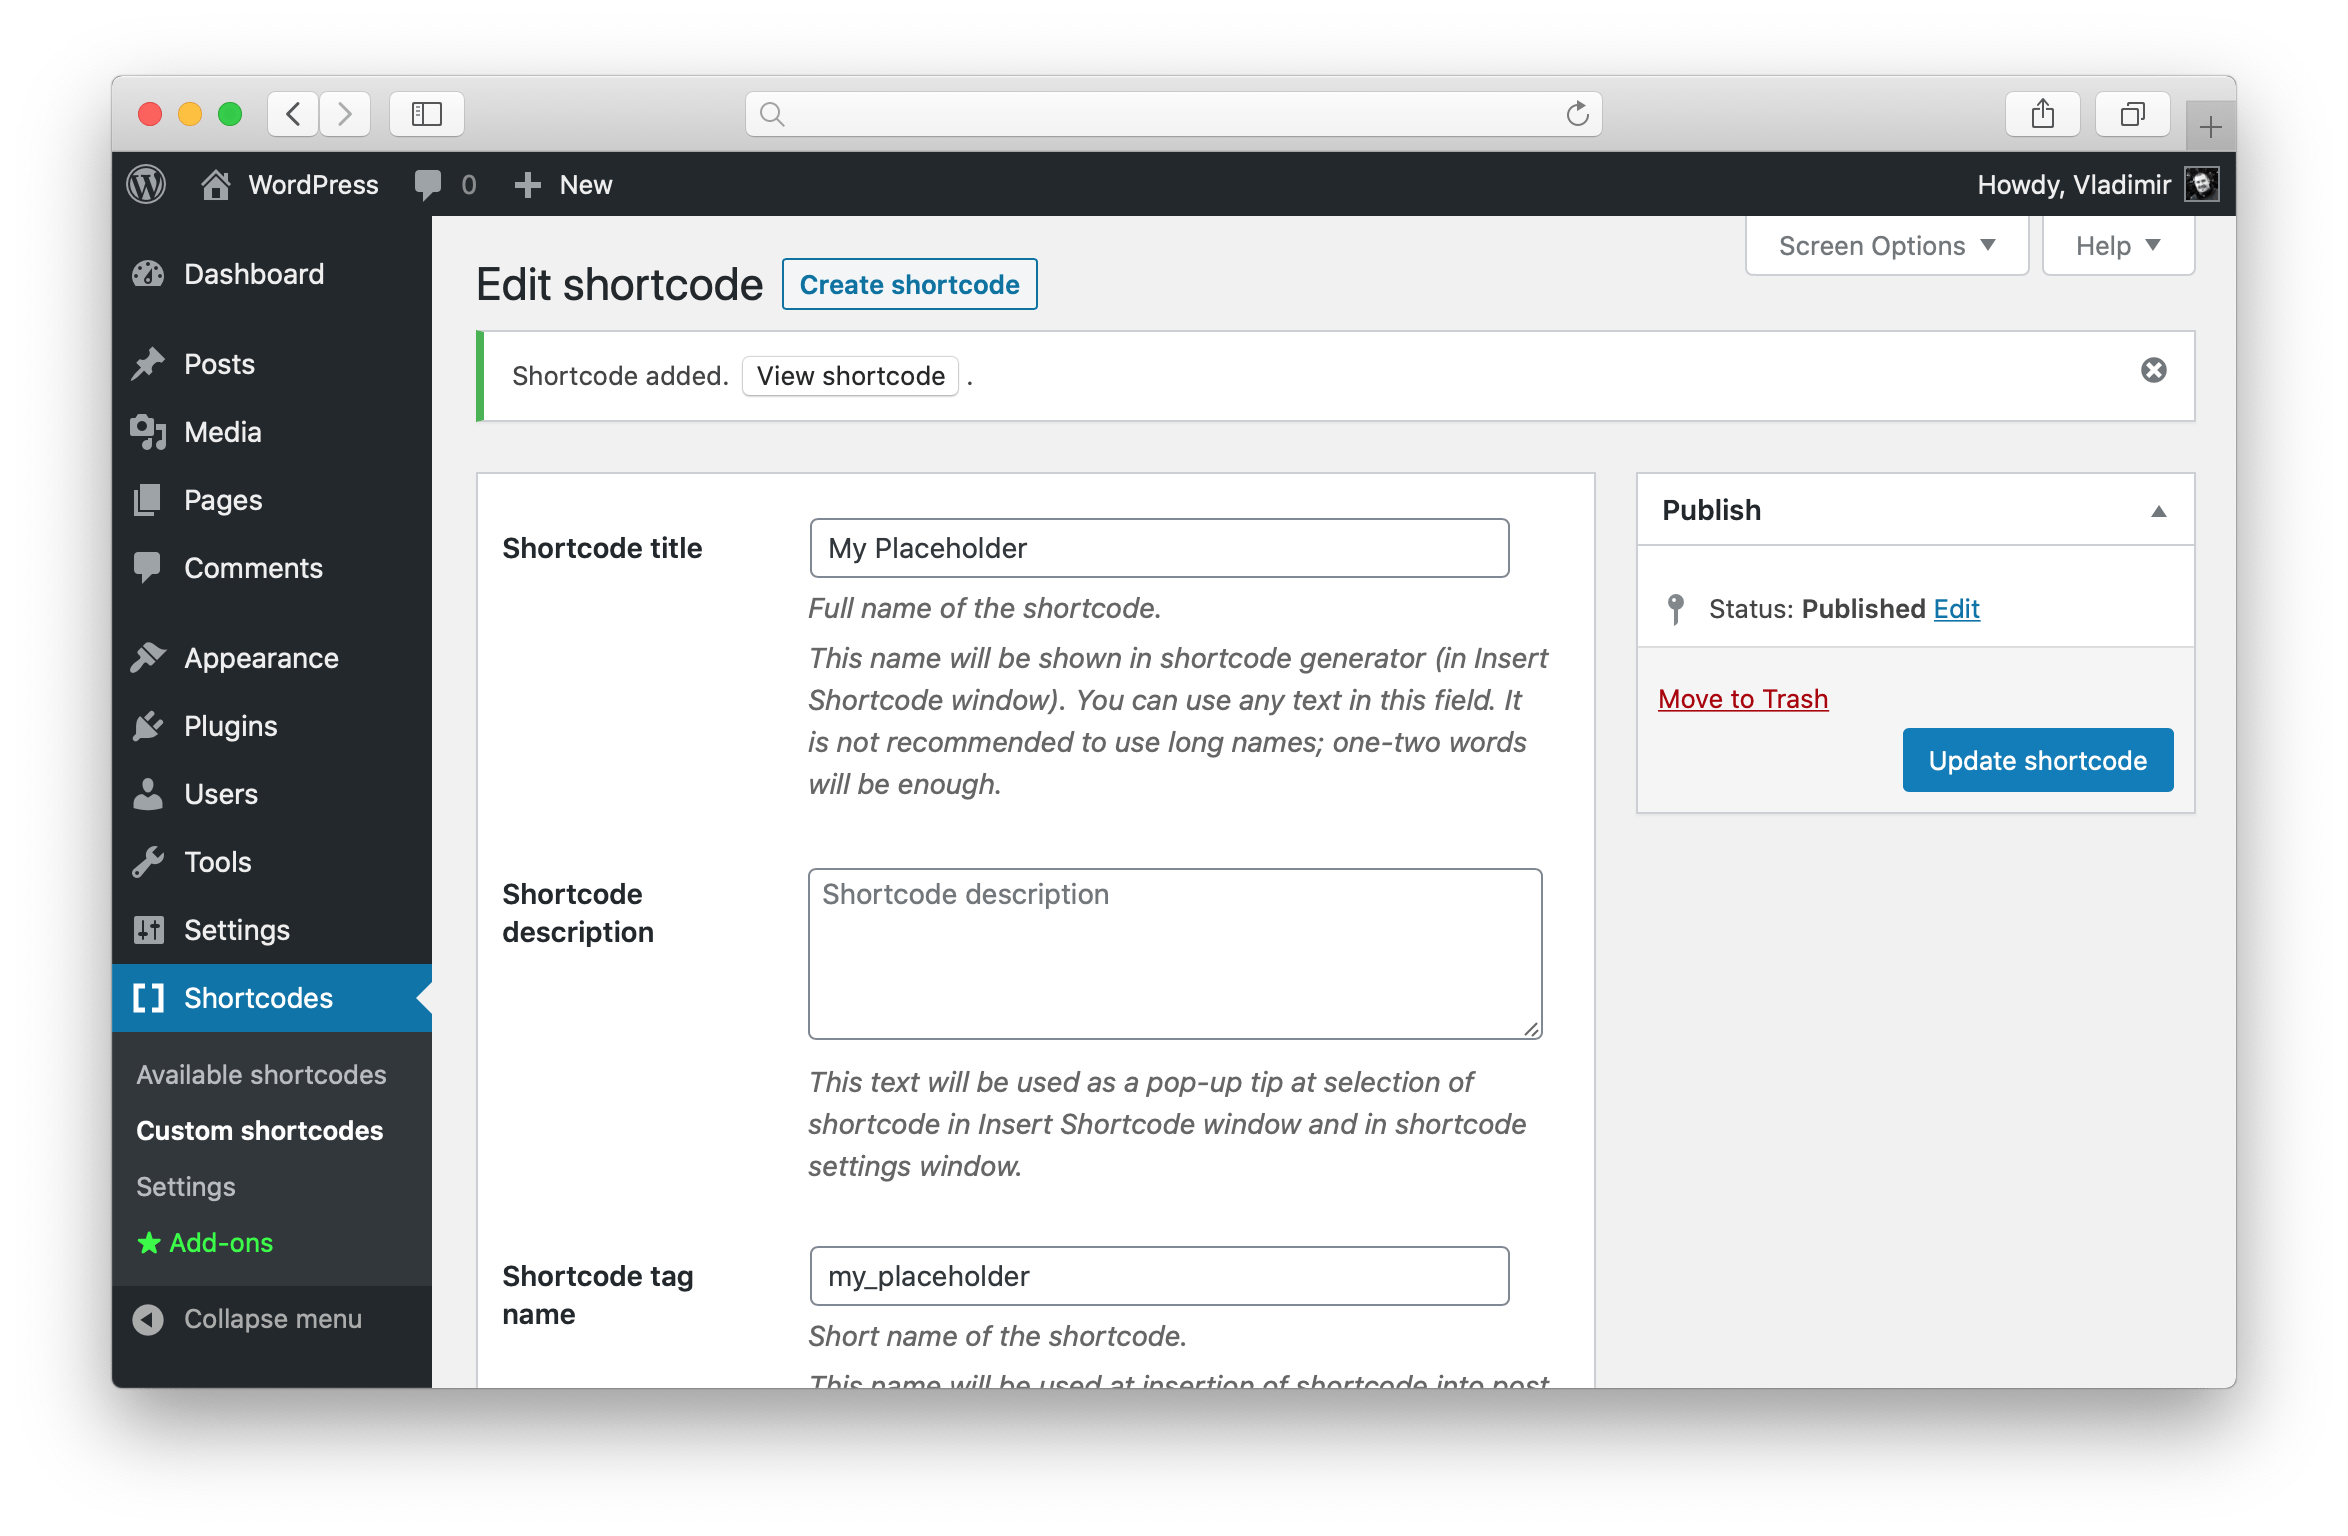
Give your new shortcode a name, for example, My Placeholder. Type it into the Shortcode title field.
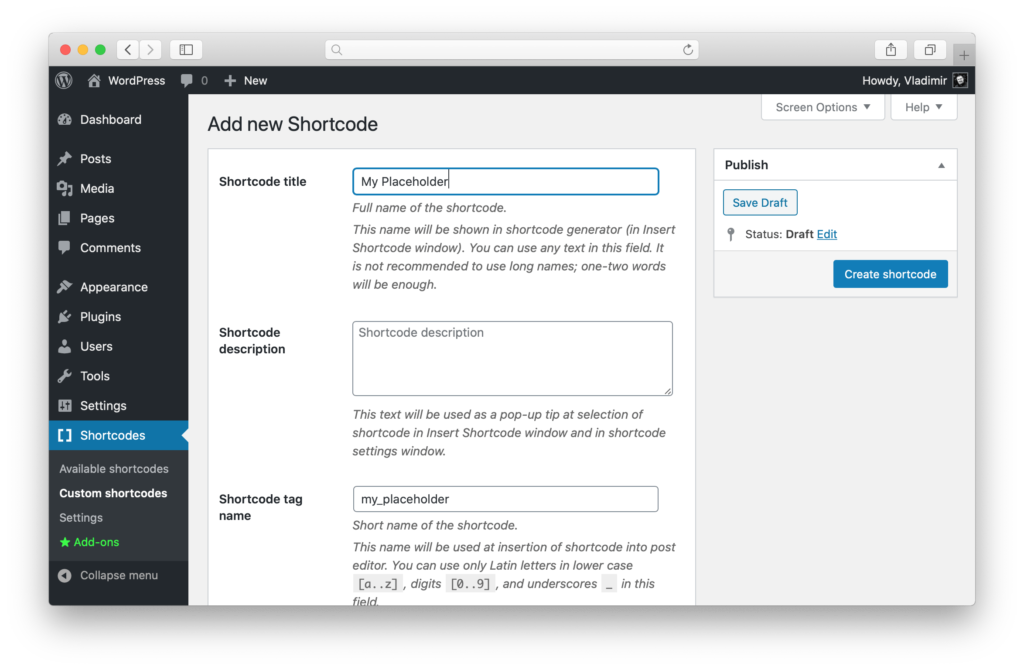
Step 3: Add a dynamic content
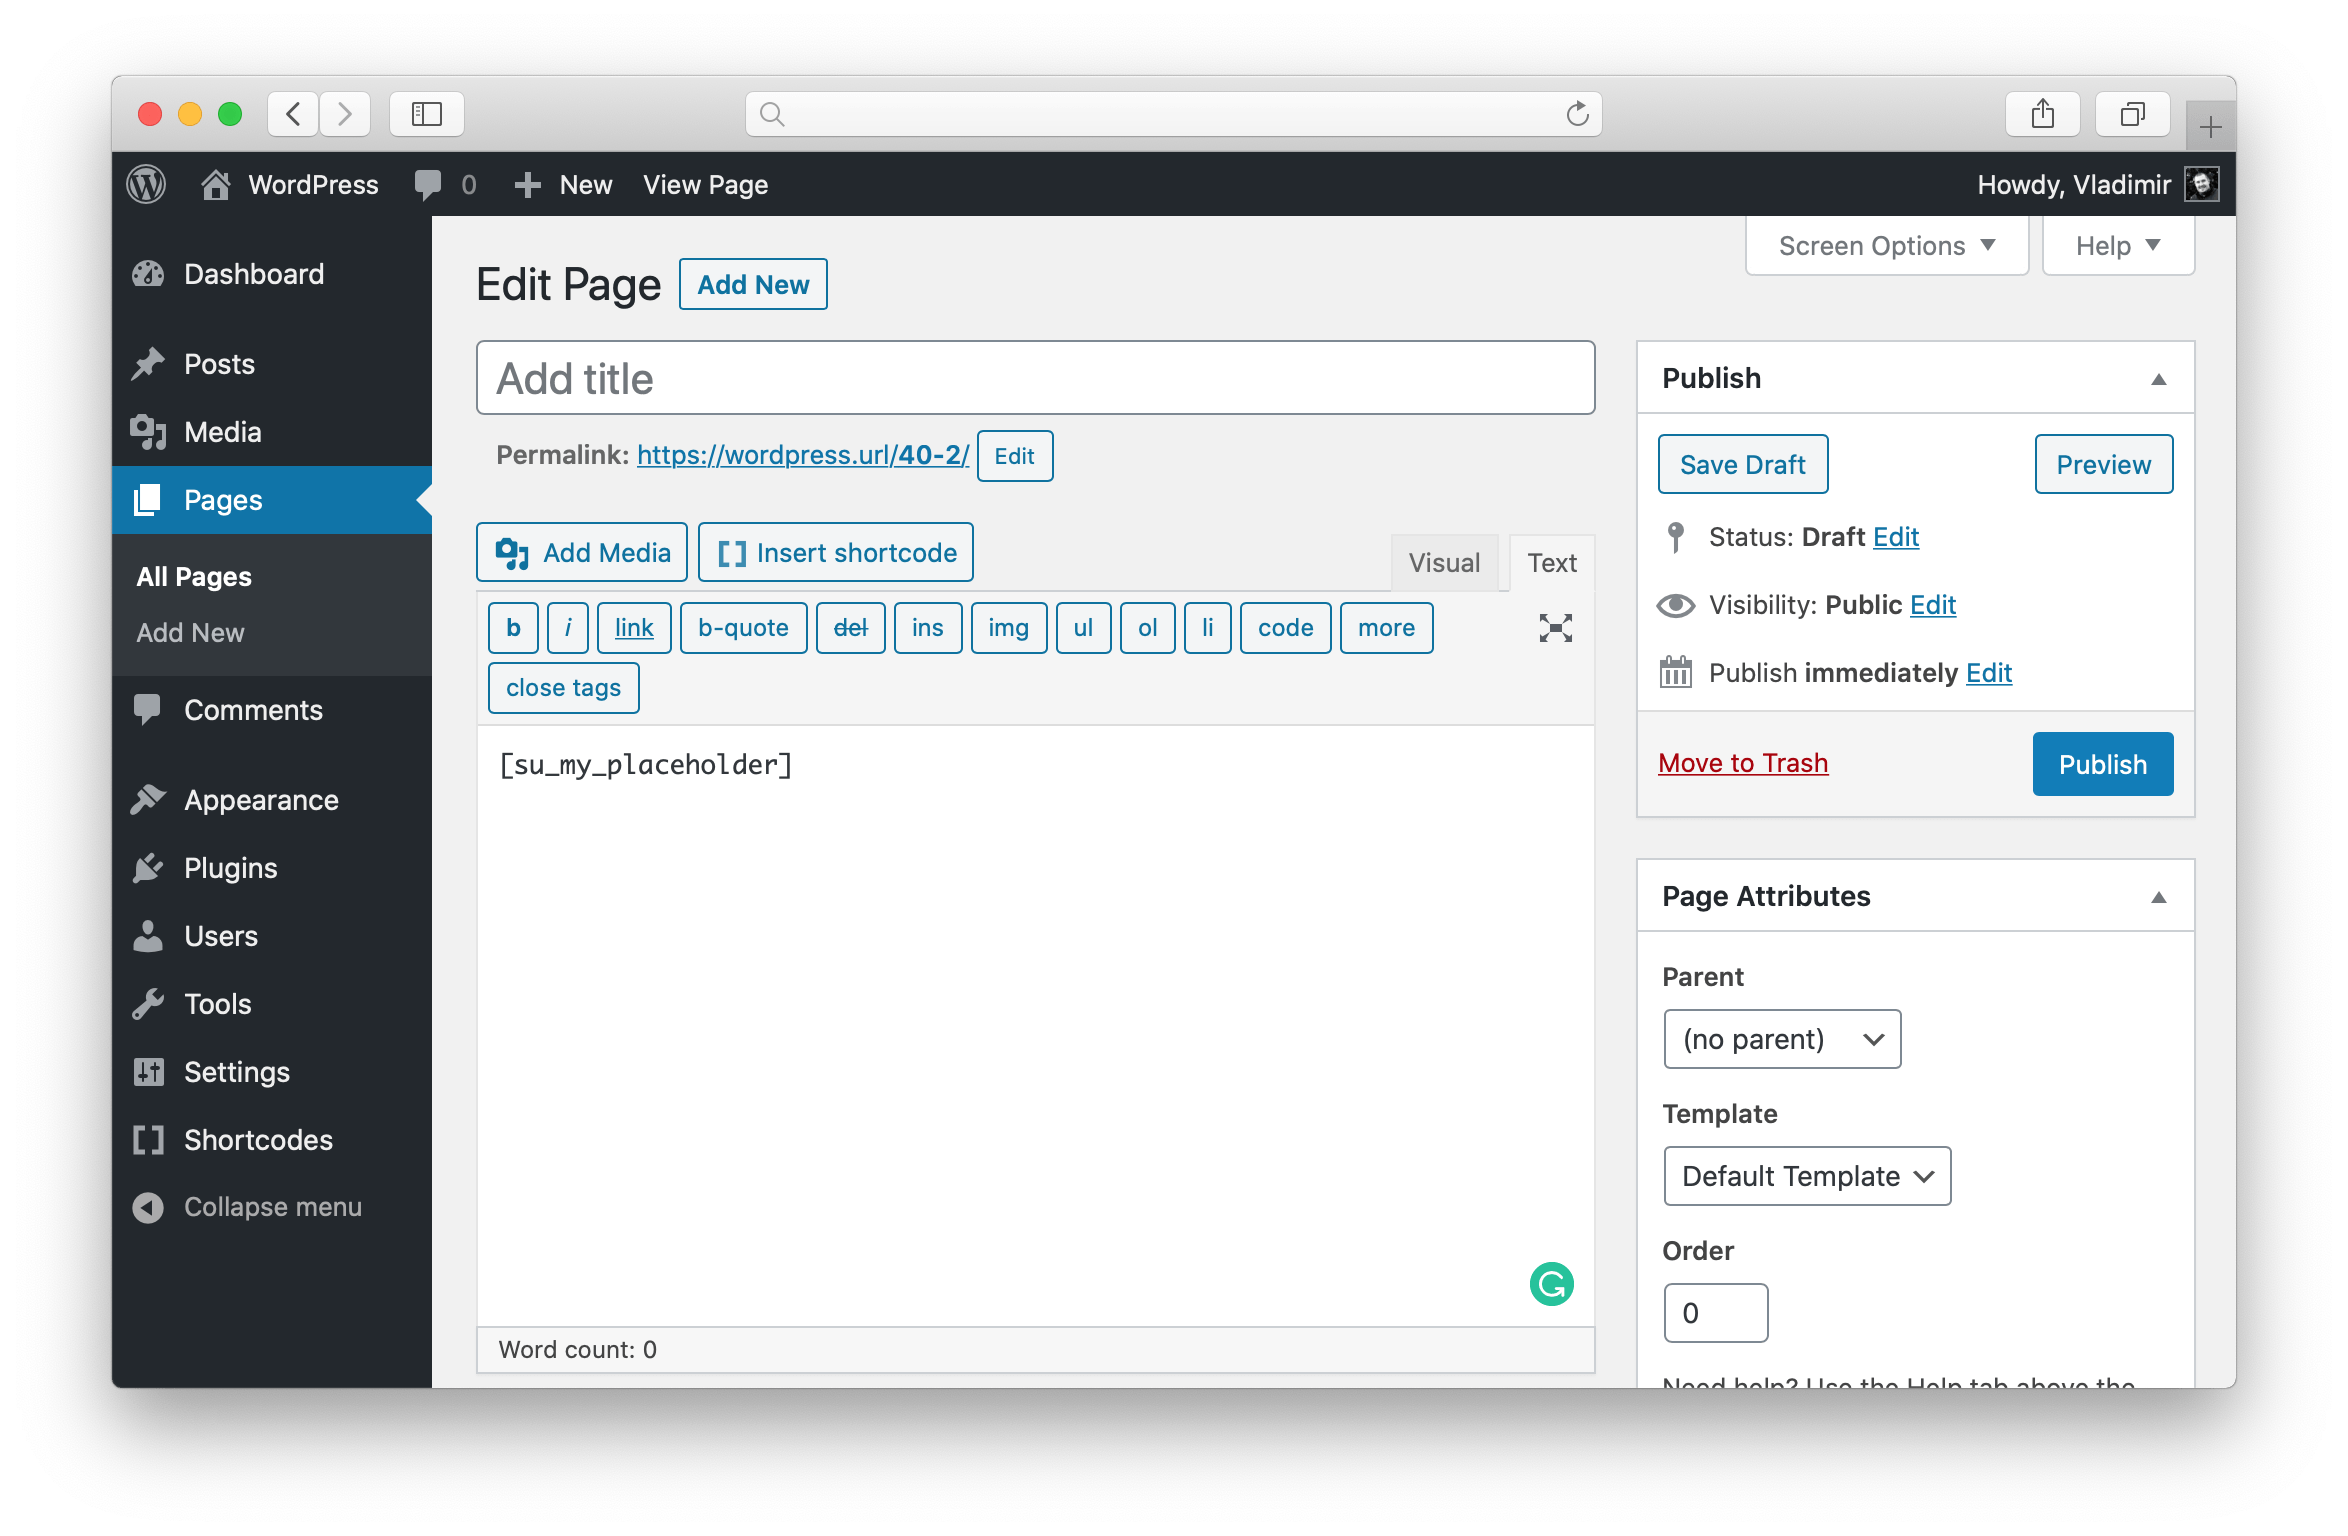
Time to add dynamic content. Scroll the page down to the Shortcode code field and add the desired content to it. This content will be displayed everywhere you’ll add the created shortcode. You can use any HTML code or even other shortcodes in this field.

Step 4: Save
Click the Create shortcode button.
Step 5: Add the placeholder to posts or pages
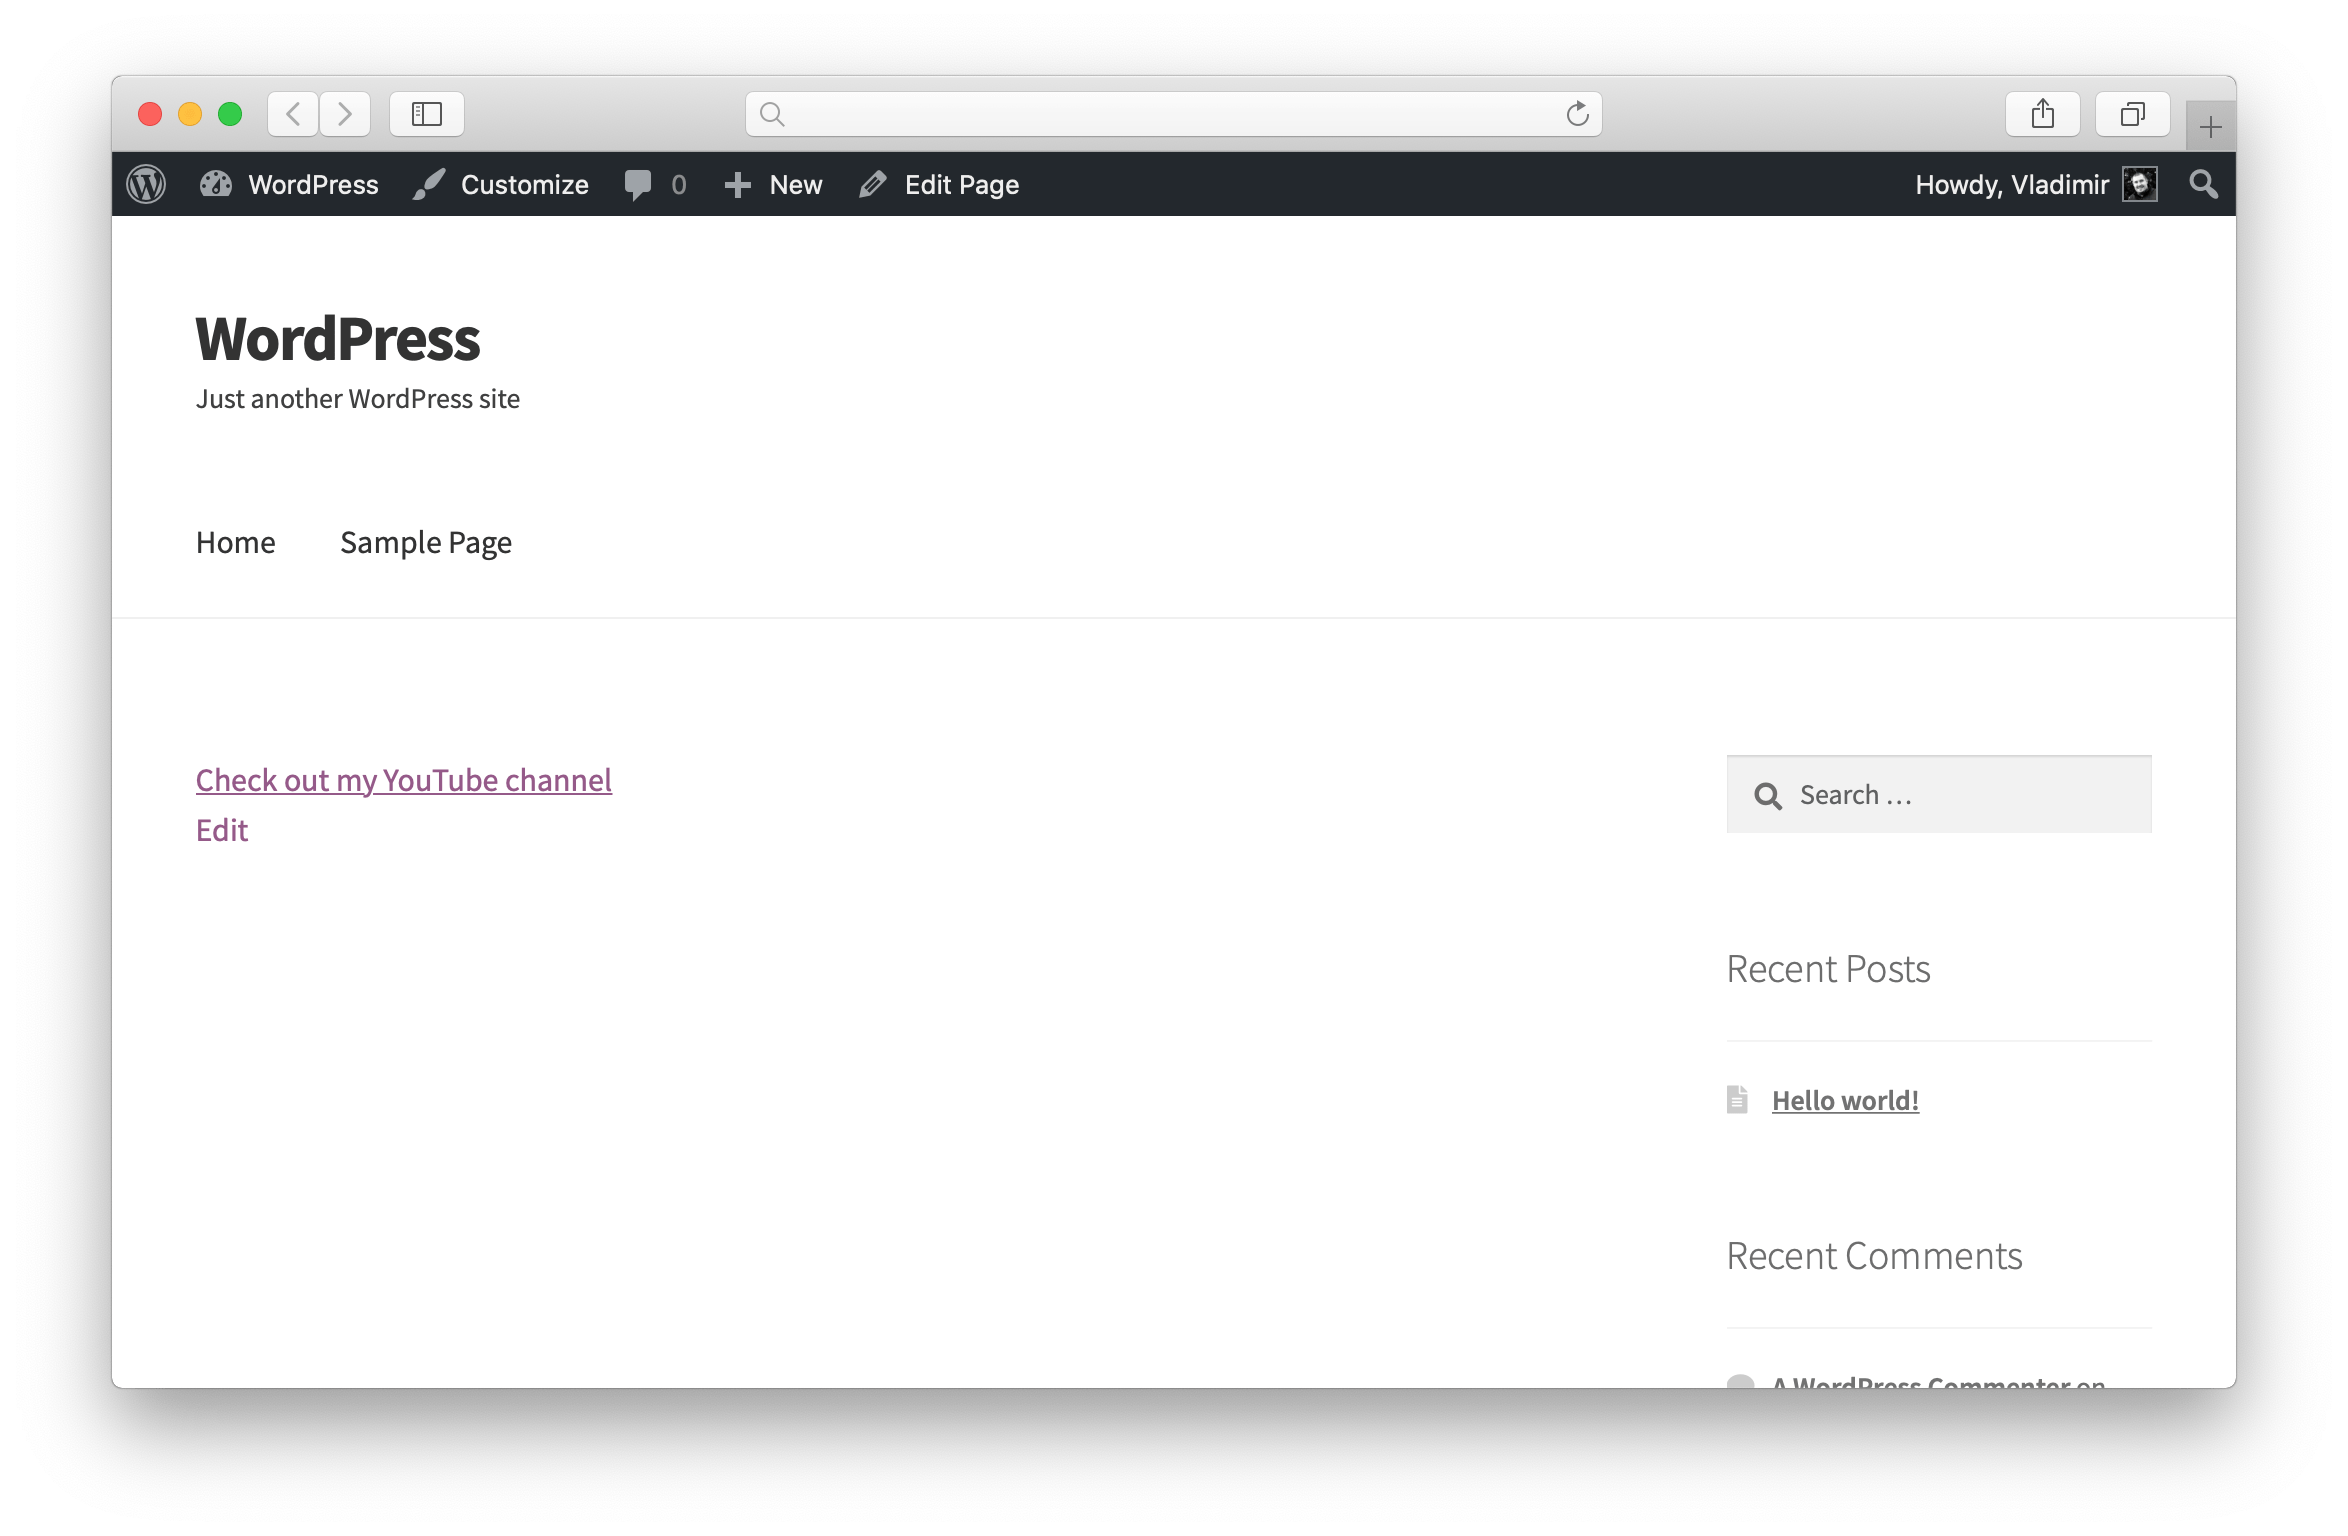
Now, you can use the freshly created shortcode to display your dynamic content. Just add the shortcode anywhere you need. For example, navigate to Dashboard – Pages – Add New and click the Insert shortcode button. The new shortcode will be available in the list.

Step 6: Edit the dynamic content
Now, when the dynamic content is displayed on your pages, you can change it. To update the dynamic content just edit the contents of the Shortcode code field (from step 3).
Shortcode Editor
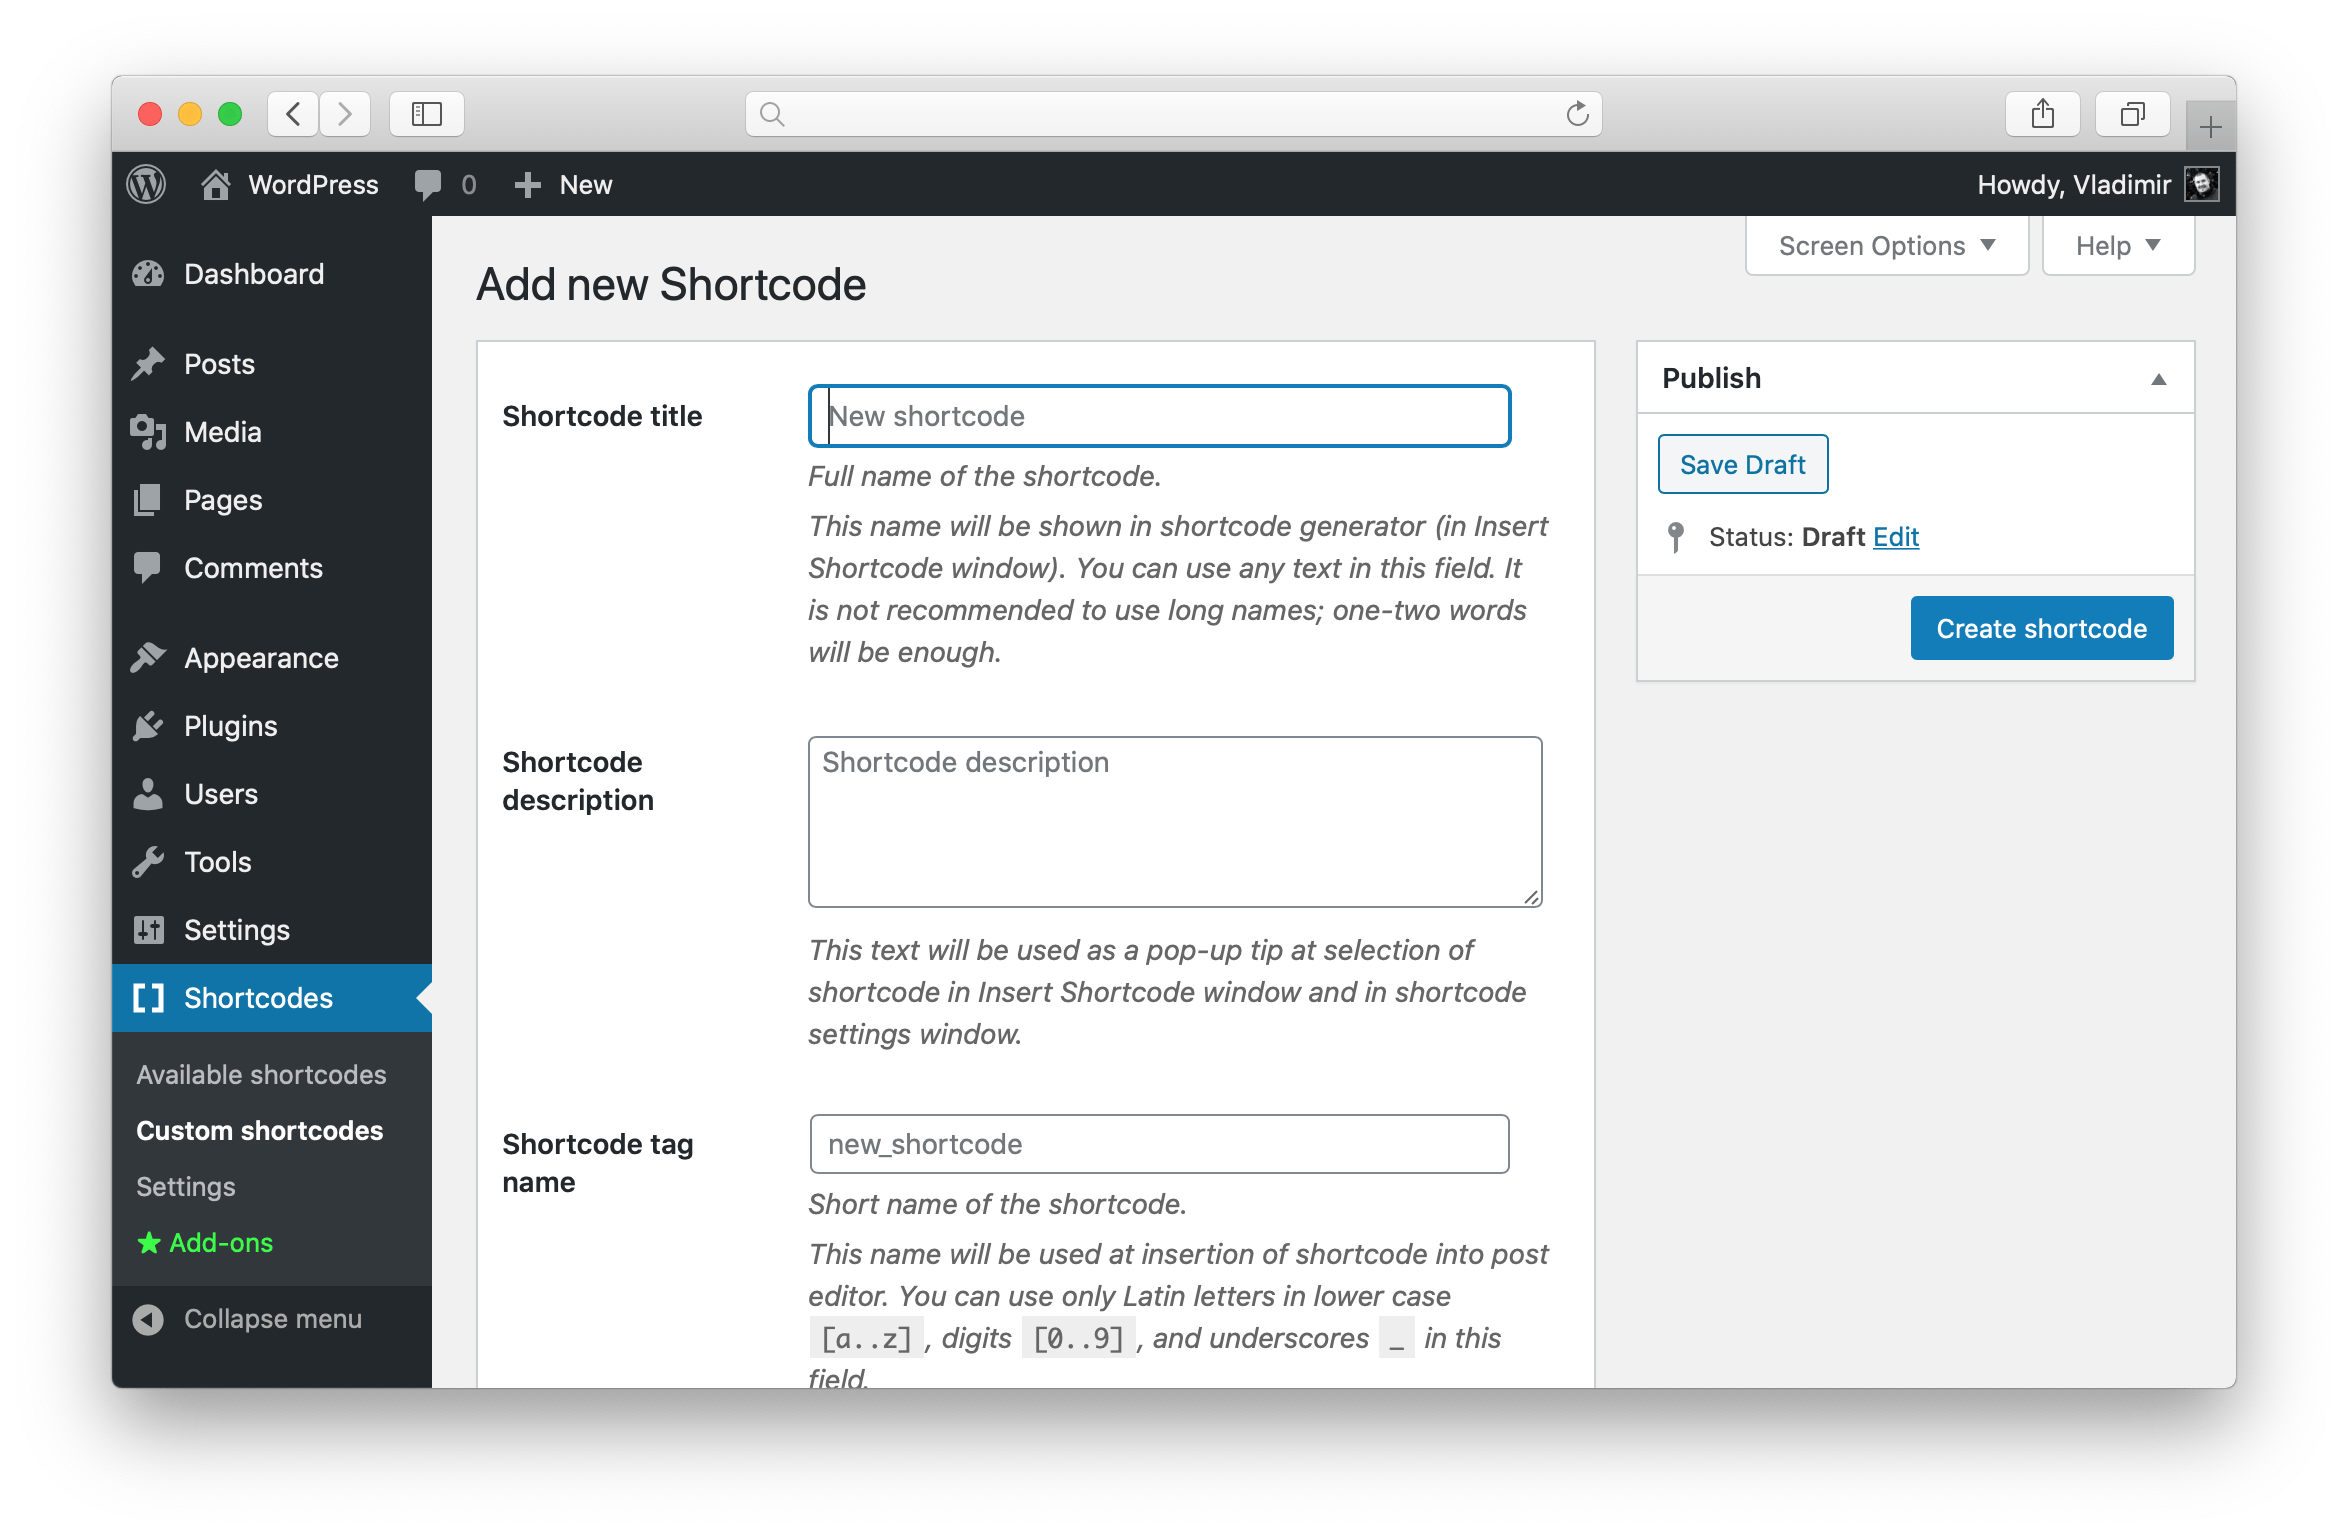
Navigate to Dashboard → Shortcodes → Custom shortcodes and click the Create shortcode button at the top of the screen. Below you’ll find the description of each field.

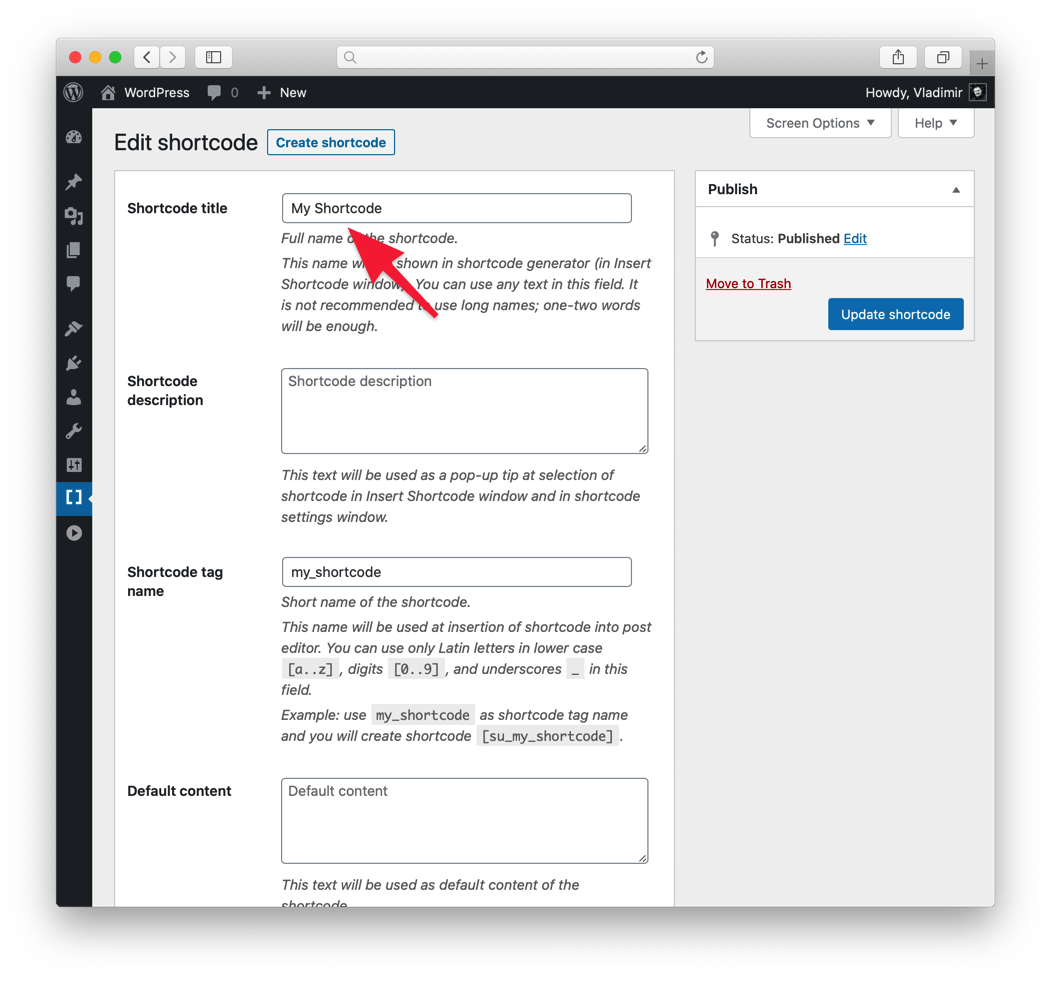
Shortcode title
Full name of the shortcode. This name will be shown in the shortcode generator (in the Insert shortcode window). You can use any text in this field. It is not recommended to use long names; one-two words will be enough.
Shortcode tag name
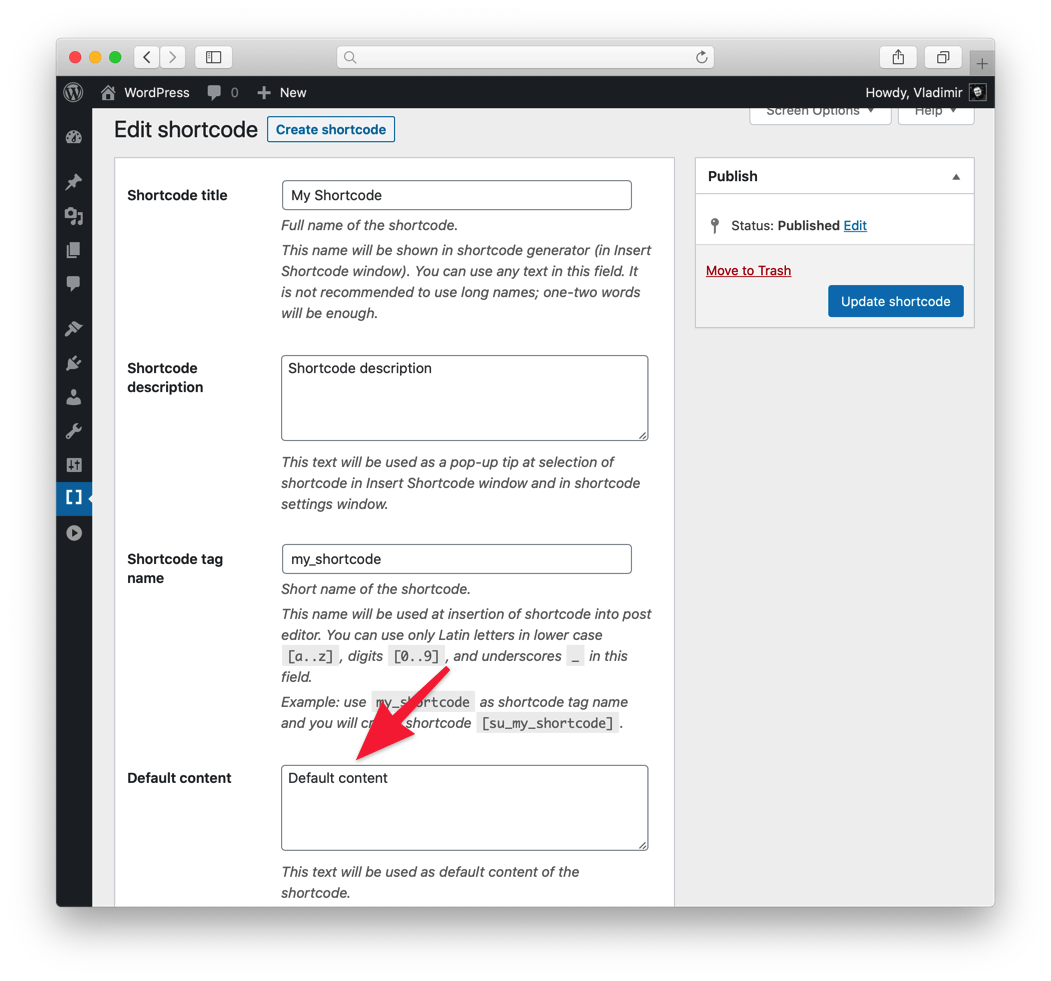
Short name of the shortcode. This value will be used at the insertion of the shortcode into the post editor. You can use only Latin letters in lower case a-z, digits 0-9, and underscores _ in this field. Example: use my_shortcode as shortcode tag name and you will create the following shortcode:
[su_my_shortcode]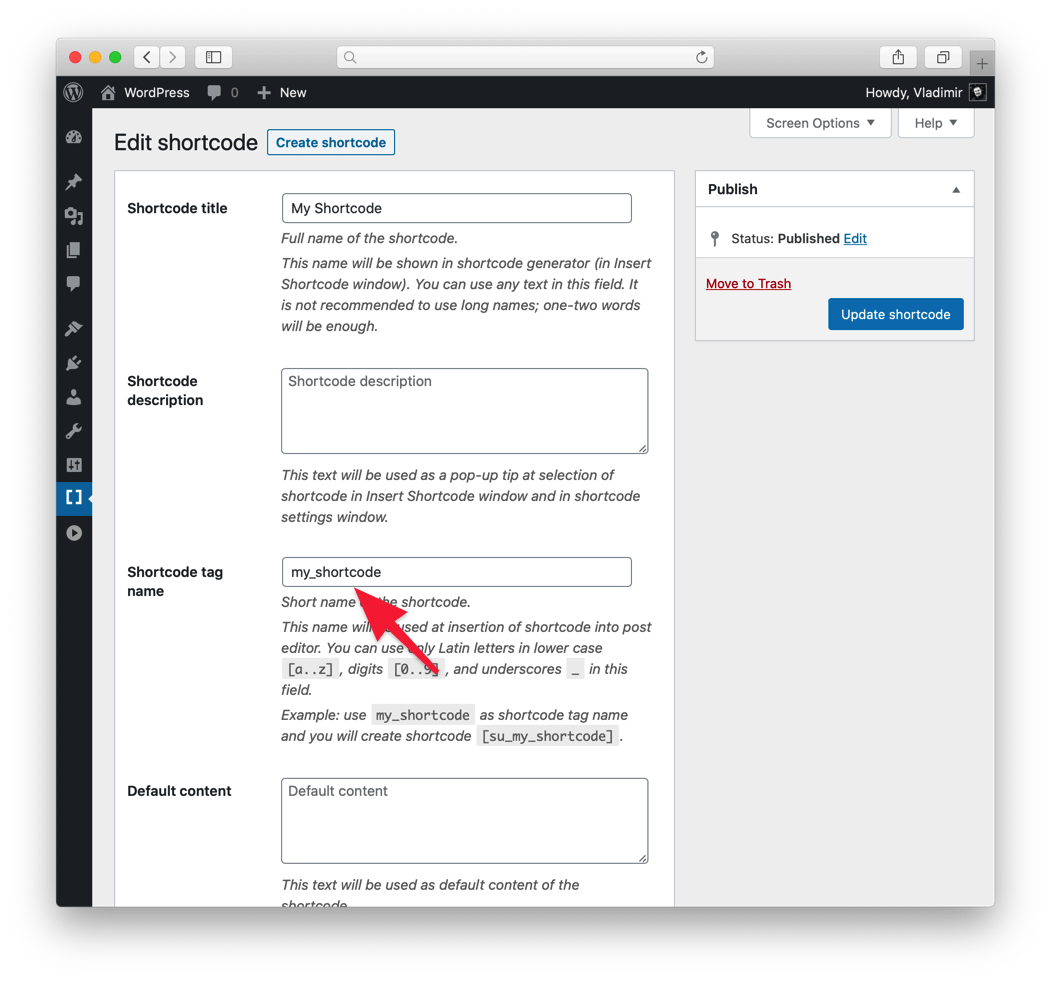

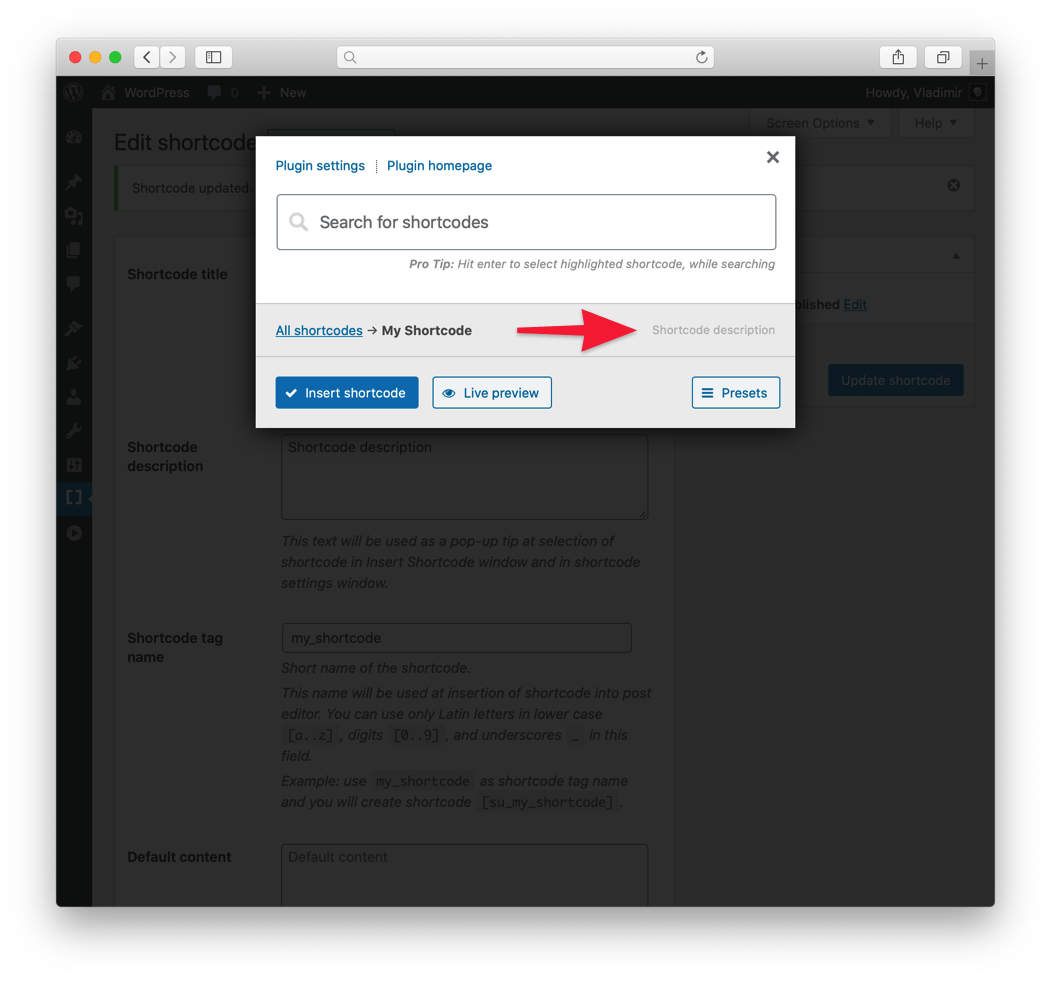
Shortcode description
A brief description of the shortcode. This value will be used as a pop-up tip at the selection of shortcode in the Insert shortcode window and in the shortcode settings window.

Default content
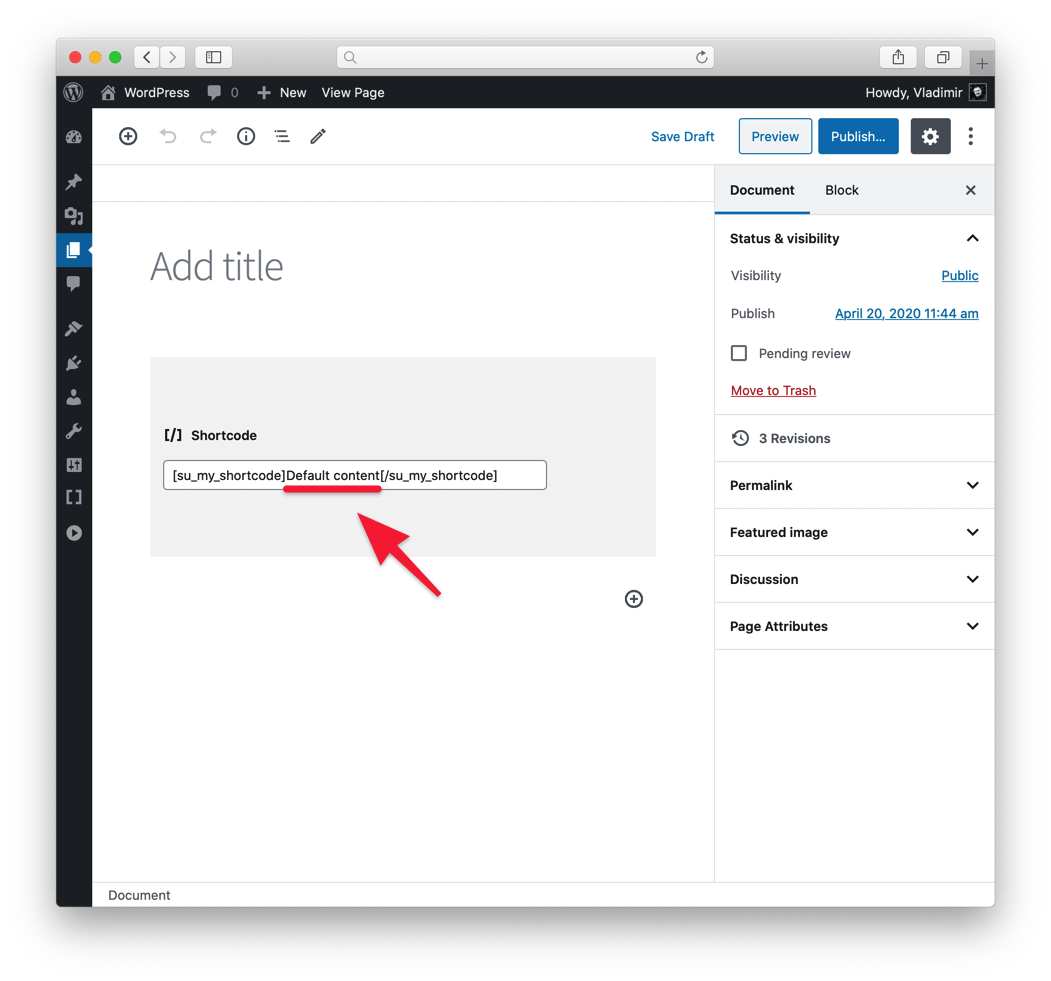
This text will be used as default content of the shortcode. Shortcode content is a text placed between opening and closing tags of the shortcode. Leave this field empty if your shortcode does not imply use of any content and closing tag. Example of shortcode with content:
[my_shortcode] Default content [/my_shortcode]

Icon
Shortcode icon. This icon will be displayed near your shortcode in the Insert shortcode window.
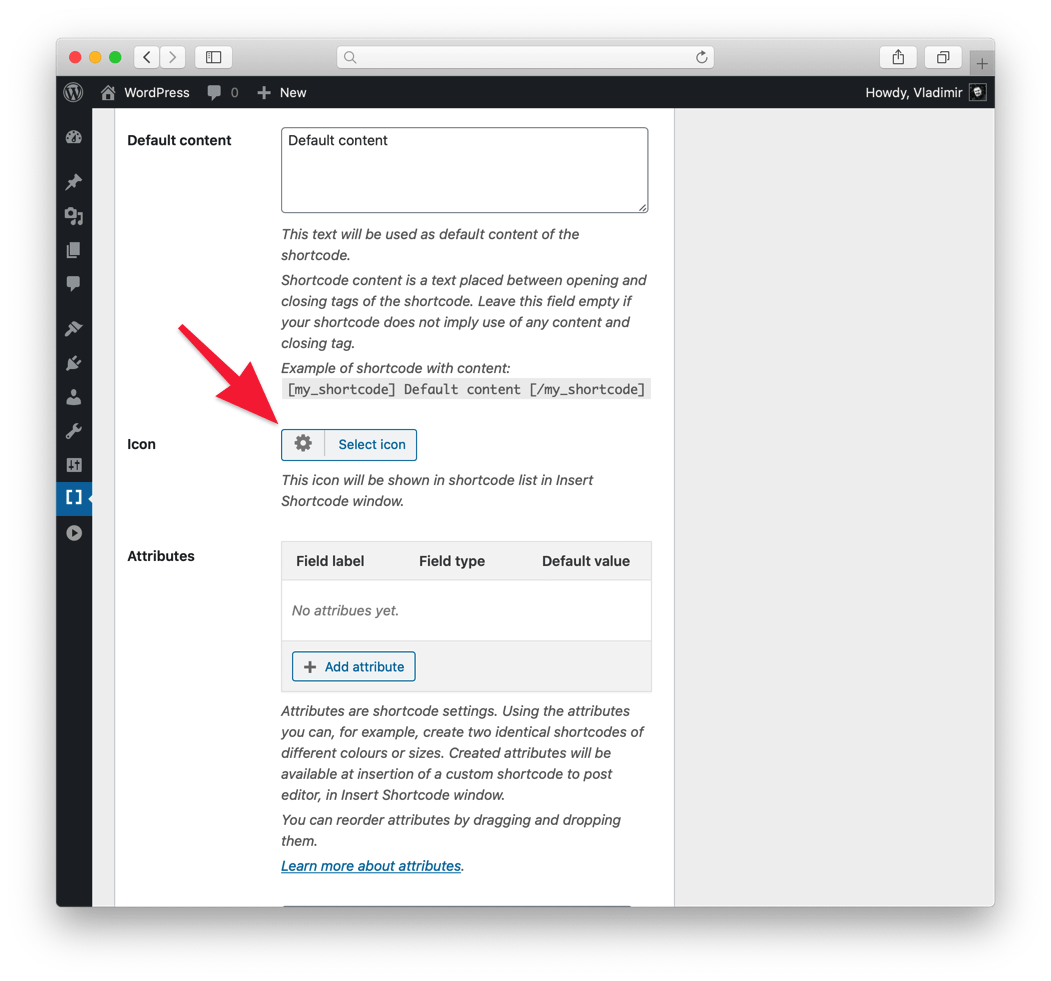
Attributes
In this section, you can add attributes (options) to your shortcode. Attributes are shortcode settings allowing you to create more flexible shortcodes. Example of a shortcode with an attribute:
[my_shortcode color="red"]
Read the Creating a shortcode section of this article to understand how you can use attributes in your shortcode.
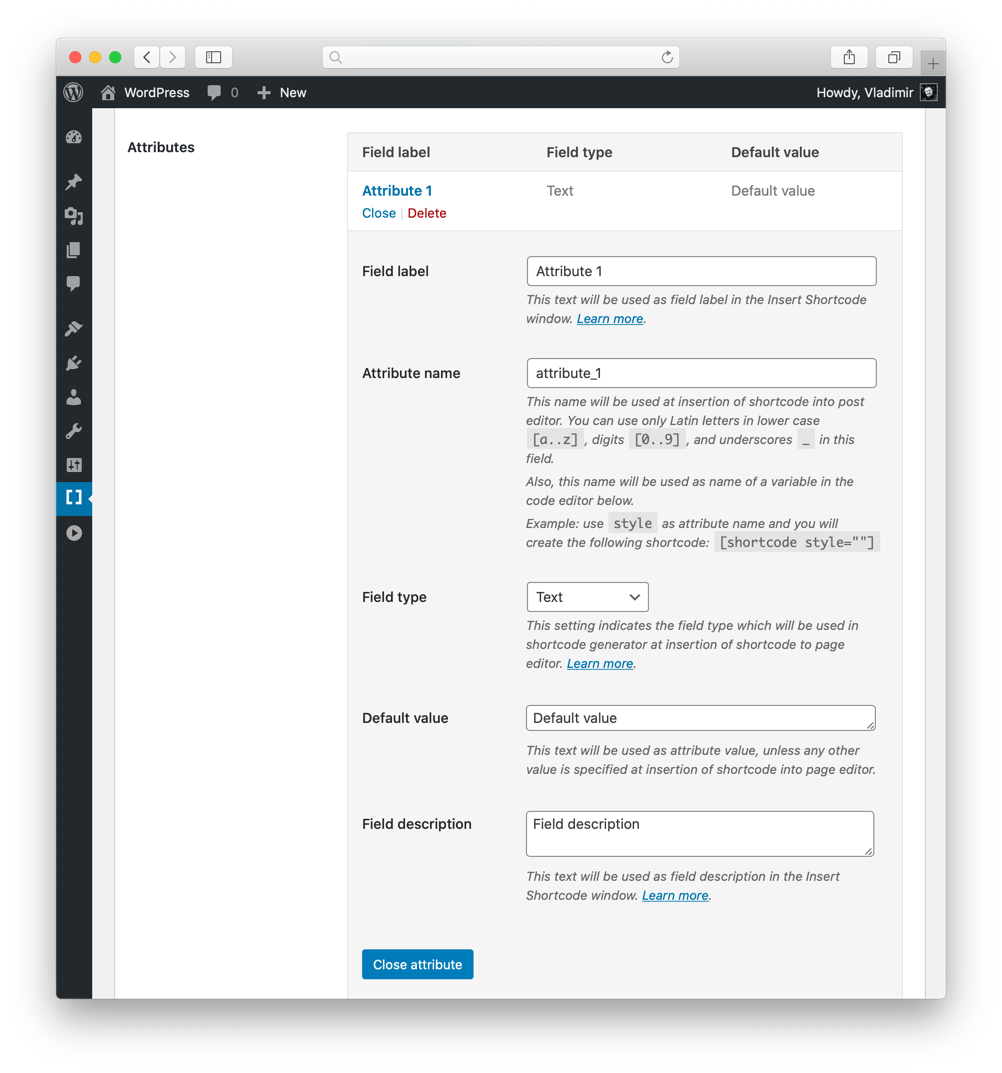
Field label
This is the label that will be displayed in the Insert shortcode window near the attribute field.
Attribute name
This is a short name that will be used in the generated shortcode and in the Shortcode code field of the shortcode editor.
Field type
This is the type of field. Read the Attribute field types section to learn what types of fields you can create.
Default value
This value will be used in the Insert shortcode window. It will also be used if you don’t specify a custom value in the shortcode.
Field description
A brief description of the field.
Code editor
This is the code that will be used (executed) to display your shortcode on the front part of your site. You can write the code in two different modes – HTML and PHP.
HTML mode
This simplified mode allows you to use HTML code and other shortcodes.
What you can use in this mode:
- Any HTML code;
- Other shortcodes;
- Variables, like {{color}} (to represent an attribute value);
- Special variable: {{content}}.
Variables will be replaced by attribute values. To display a value of an attribute, you should write its name (Attribute name) in double curly brackets. For example, if the attribute name is color, then your variable will look like {{color}}. Also, you can use the {{content}} variable, which will be replaced with shortcode content (the text between the opening and closing tags of the shortcode).
Read the Creating a shortcode section of this article to better understand what variables are and how you can utilize them.

PHP mode
This mode is intended for advanced users and has much more powerful capabilities compared to HTML mode. In this mode, you can use PHP code.
The code contained in the editor is a body of function invoked at the execution of a shortcode. This means you cannot define new functions or classes in your code. This also means that you should not use opening and closing PHP tags (<?php and ?>) in the beginning and in the end of your code.
You can use variables to get the value of a shortcode attribute. Attribute names should be written in a standard for PHP language way, with a dollar sign at the start. For example, if the name of the attribute is color, then the variable should be written as $color.
Similar to HTML mode you can use $content variable which will contain shortcode content (text between opening and closing tags of the shortcode).
Besides, you can use standard WordPress functions, as well as the other shortcodes. You can find more information on the use of other shortcodes with the help of do_shortcode function in Use of shortcodes in template files article.
In this mode, you can use the keyword echo to display shortcode output.
Attribute field types
You can change the way your attributes work and look in the Insert shortcode window by changing their type and settings. The following part will describe available field types and how you can use them.
Text
Simple text field.

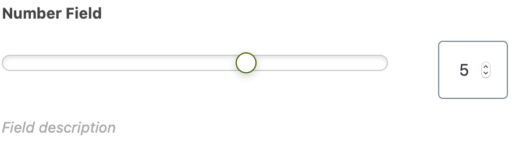
Number
This field allows a user to choose a number. You can define the minimum and the maximum number as well as the step size.
Color
The color picker field. Allows a user to pick a HEX color in the following format:
#AABBCC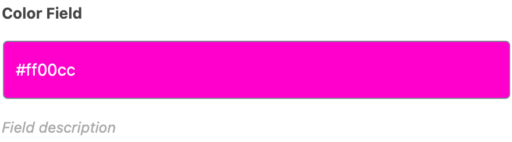
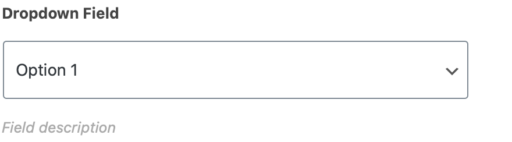
Dropdown
Dropdown field. You can define multiple options with labels in the following format:
option1|Option 1 Label
option2|Option 2 Label
This field returns only selected value, without a label.
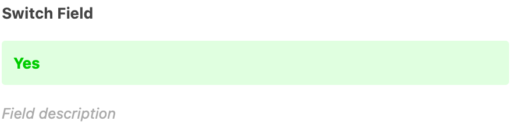
Switch
Toggle field. This field allows a user to set the attribute value to yes or to no. Mostly useful in PHP mode. Example PHP code:
if ( $my_attribute === 'yes' ) {
   // do something if the field was set to Yes
}
Icon
Icon picker field. This field allows a user to pick an icon from the ForkAwesome icon set or use an image from the Media Library. The resulting value may be a ForkAwesome icon name in the following format – icon: icon-name or an image URL. This field type can only be helpful in the PHP mode.
The value can be processed with the su_html_icon() function. The code below shows how you can use it. Depending on the $icon value, the function will return markup with <i> or <img> tag.
In other words, the su_html_icon() function takes a string like icon: star and turns it into a string like <i class="sui sui-star" style="width:48px;height:48px;"><i>. Also, it can take a string like https://example.com/image.png and turn it into <img src="https://example.com/image.png" width="48" height="48" />.
echo su_html_icon( array(
  'icon'       => $icon,     // this is the value of the attribute
  'size'       => 48,        // Icon size
  'color'      => '#ffcc00', // ForkAwesome icon color
  'style'      => '',        // Additional CSS styles
  'alt'        => '',        // Alternative text for <img> icon
  'enqueue-fa' => false,     // Set to true to load the ForkAwesome font
) );
Media Library
Image picker field. This field allows a user to pick an image from the Media Library. Selected image URL will be used as the attribute value.
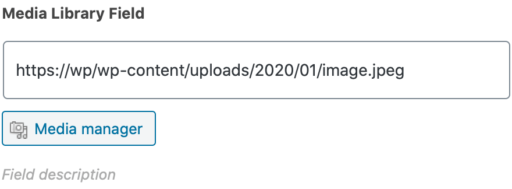
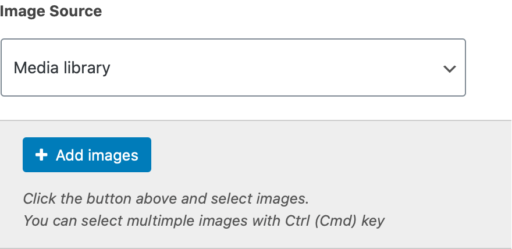
Image Source
A complex field for picking multiple images. Works similar to the Image Source field in the Image Carousel shortcode.
The value can be processed with the su_get_gallery_slides() function. Also, you can download the Simple Gallery demo shortcode and import it to your site to better understand how this field type can be utilized.
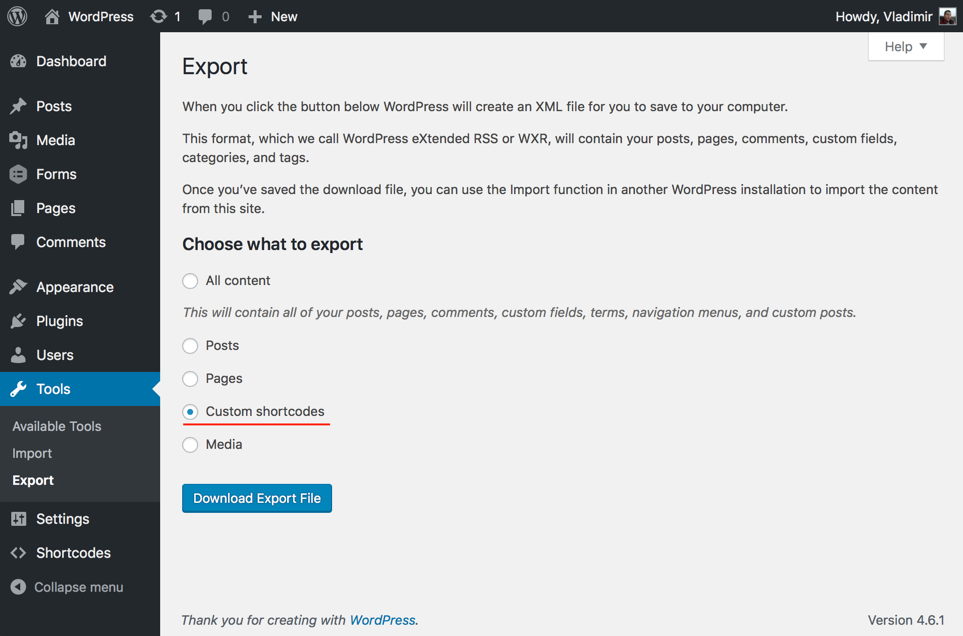
Exporting custom shortcodes
You can export created shortcode into an .xml file to import it later using the built-in WordPress tool. Take the following steps to export shortcodes:
- Navigate to Dashboard → Tools → Export;
- Select Custom shortcodes and press the Download Export File button.
Download of the .xml file containing your shortcodes will be started. You can now import this file on another site.
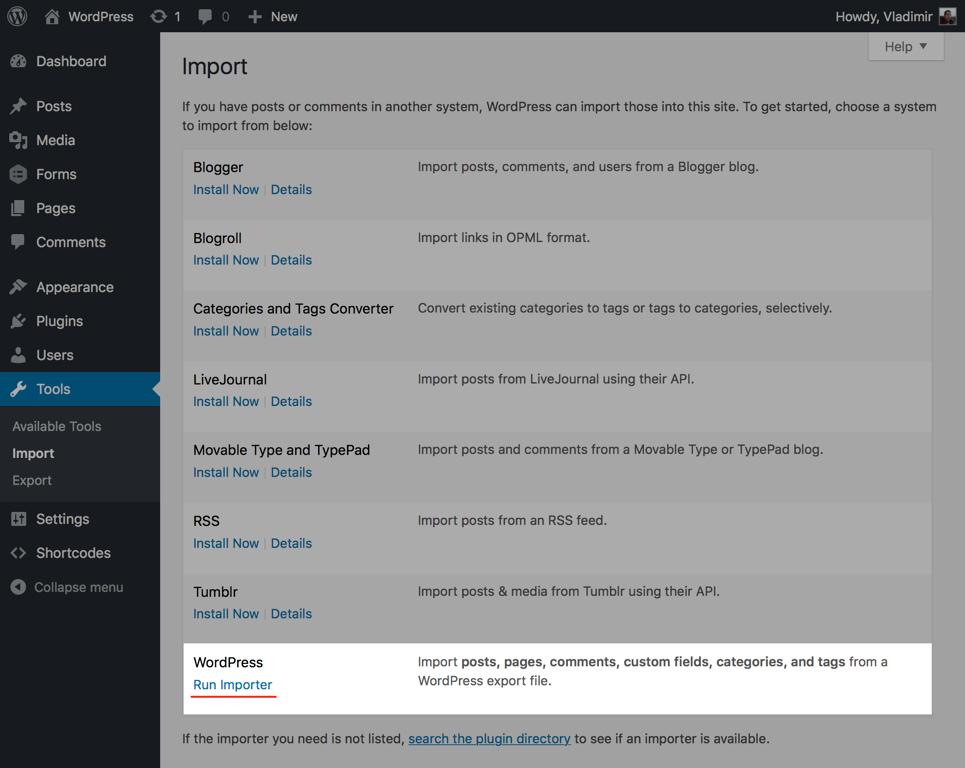
Importing custom shortcodes
Take the following steps to import custom shortcodes:
- Navigate to Dashboard → Tools → Import;
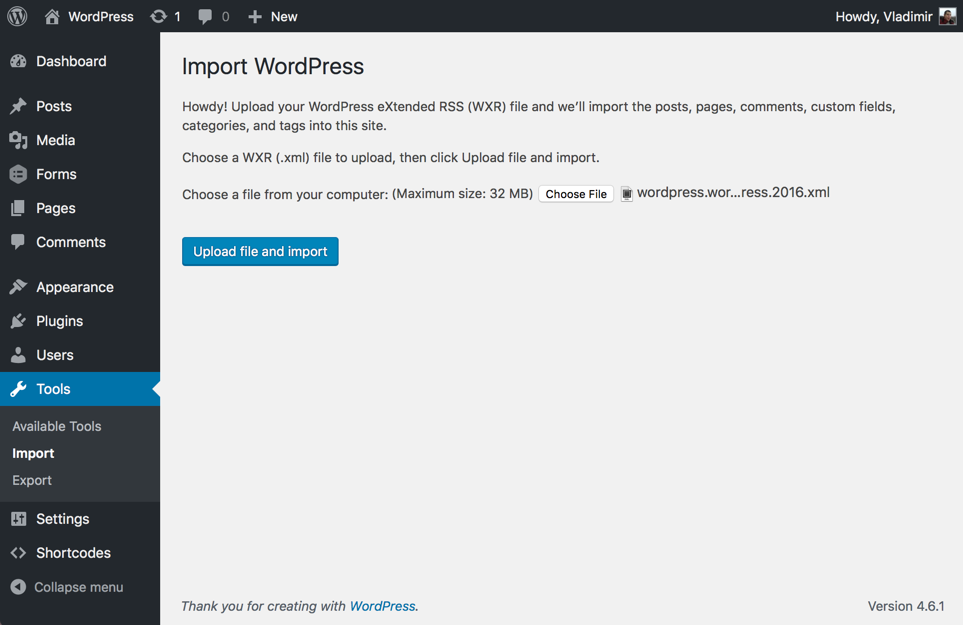
- Find WordPress in the list and click the Run Importer link;
- Choose an
.xmlfile with shortcodes and press the Upload file and import button.
New shortcodes will be available under the Dashboard → Shortcodes → Custom shortcodes page after completion of the import process.